Archive for category Hail Caesar
Little Wars: Battle of Metaurus
Posted by chicagoterrainfactory in Hail Caesar on April 22, 2024
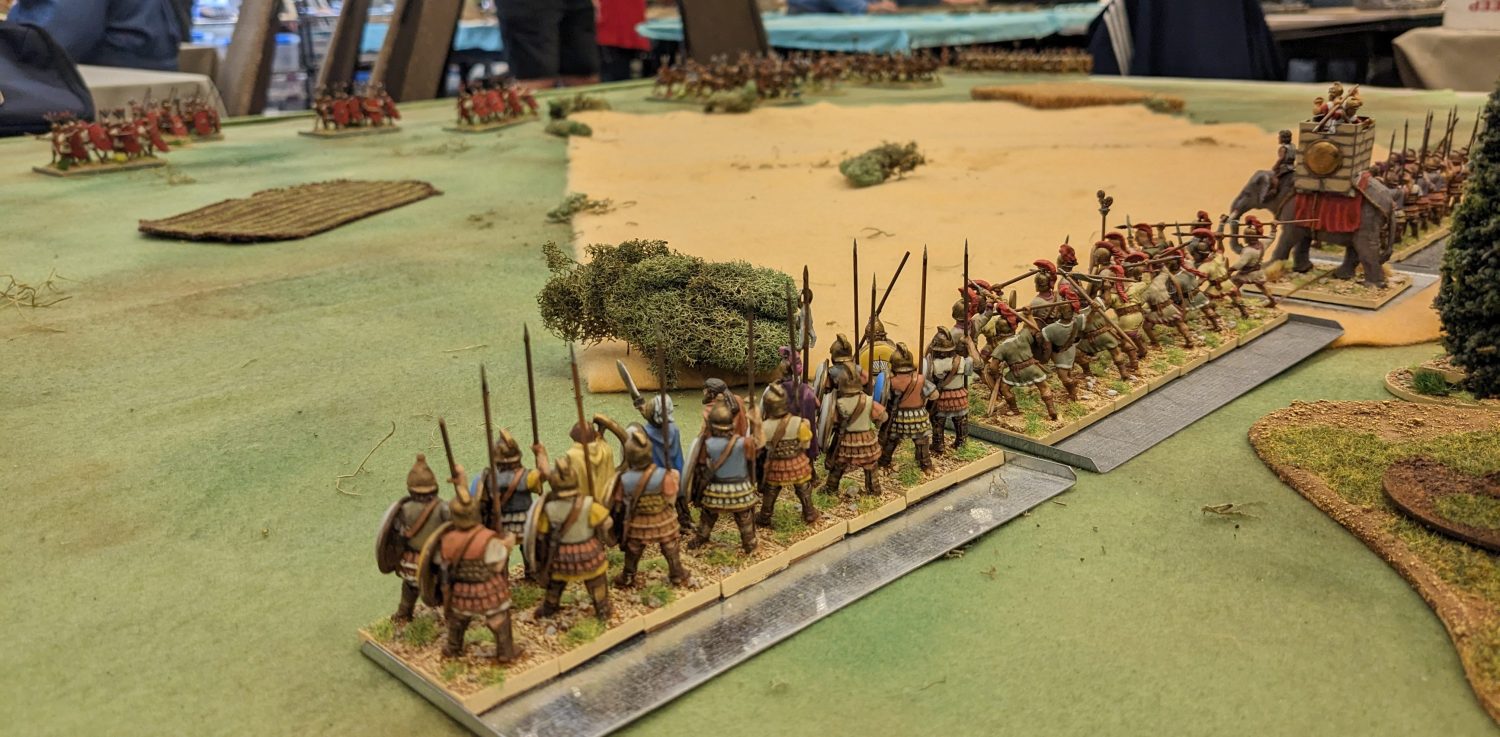
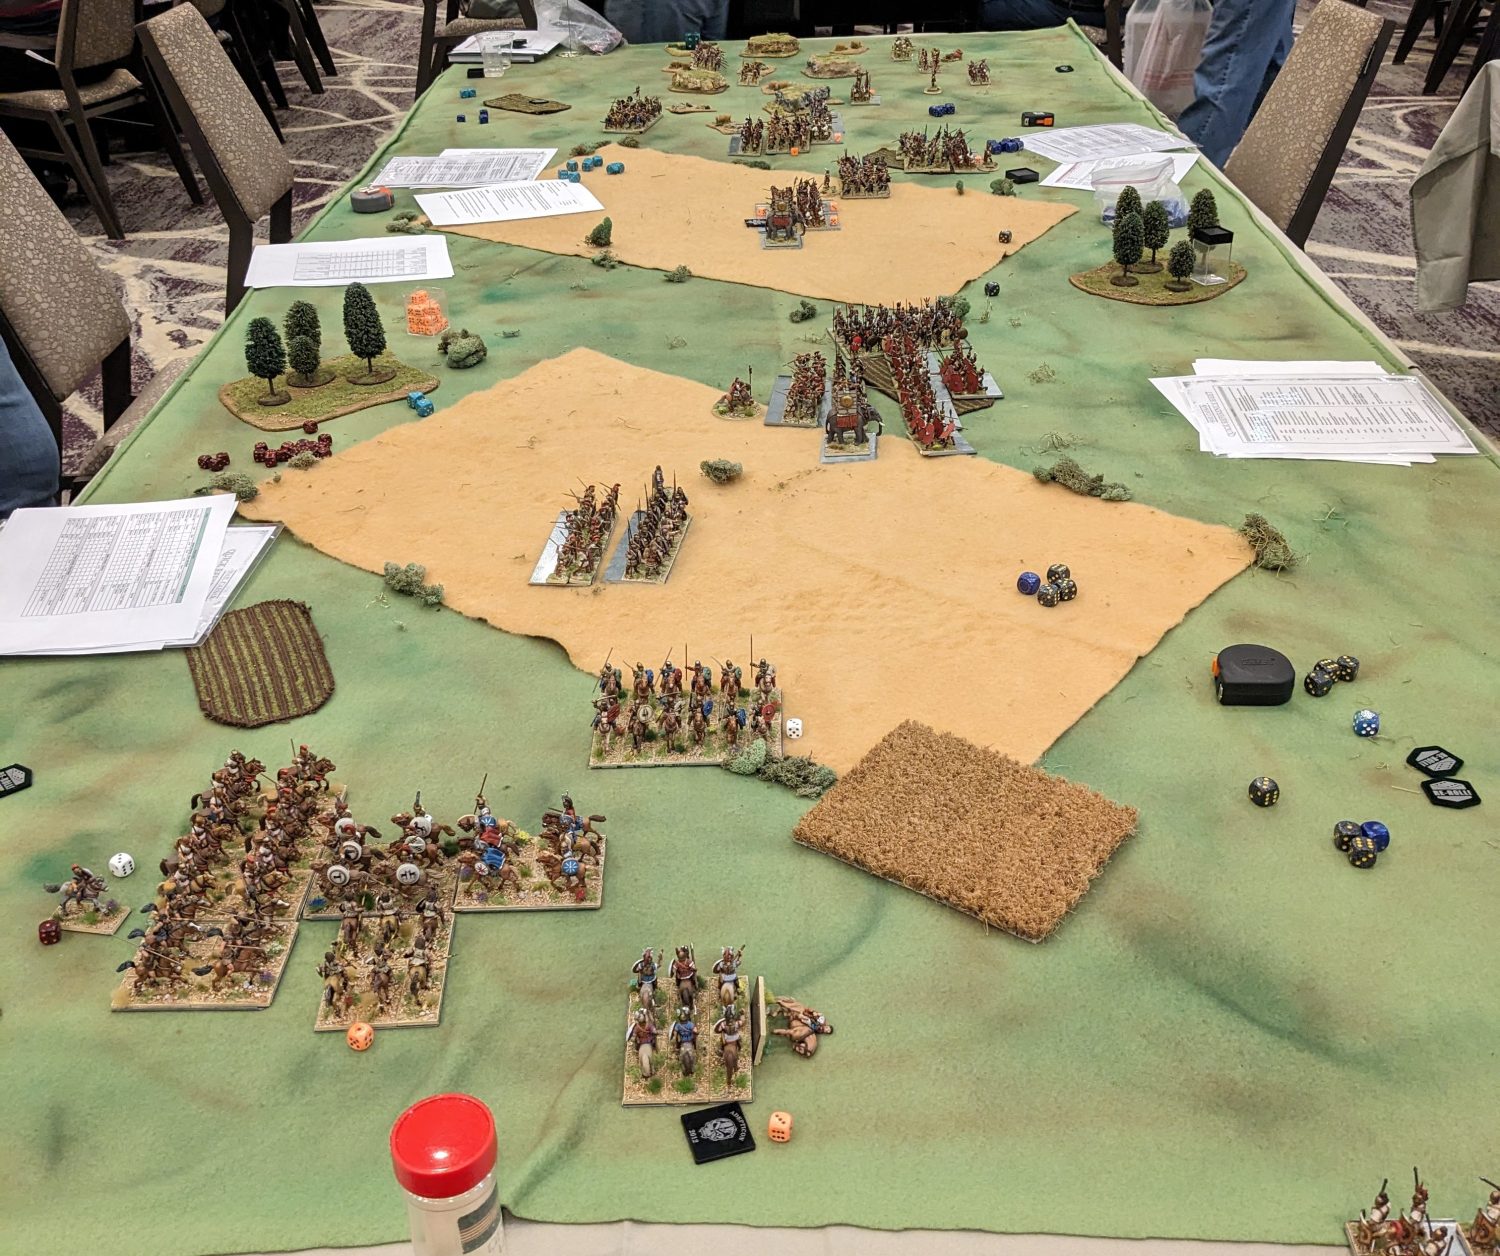
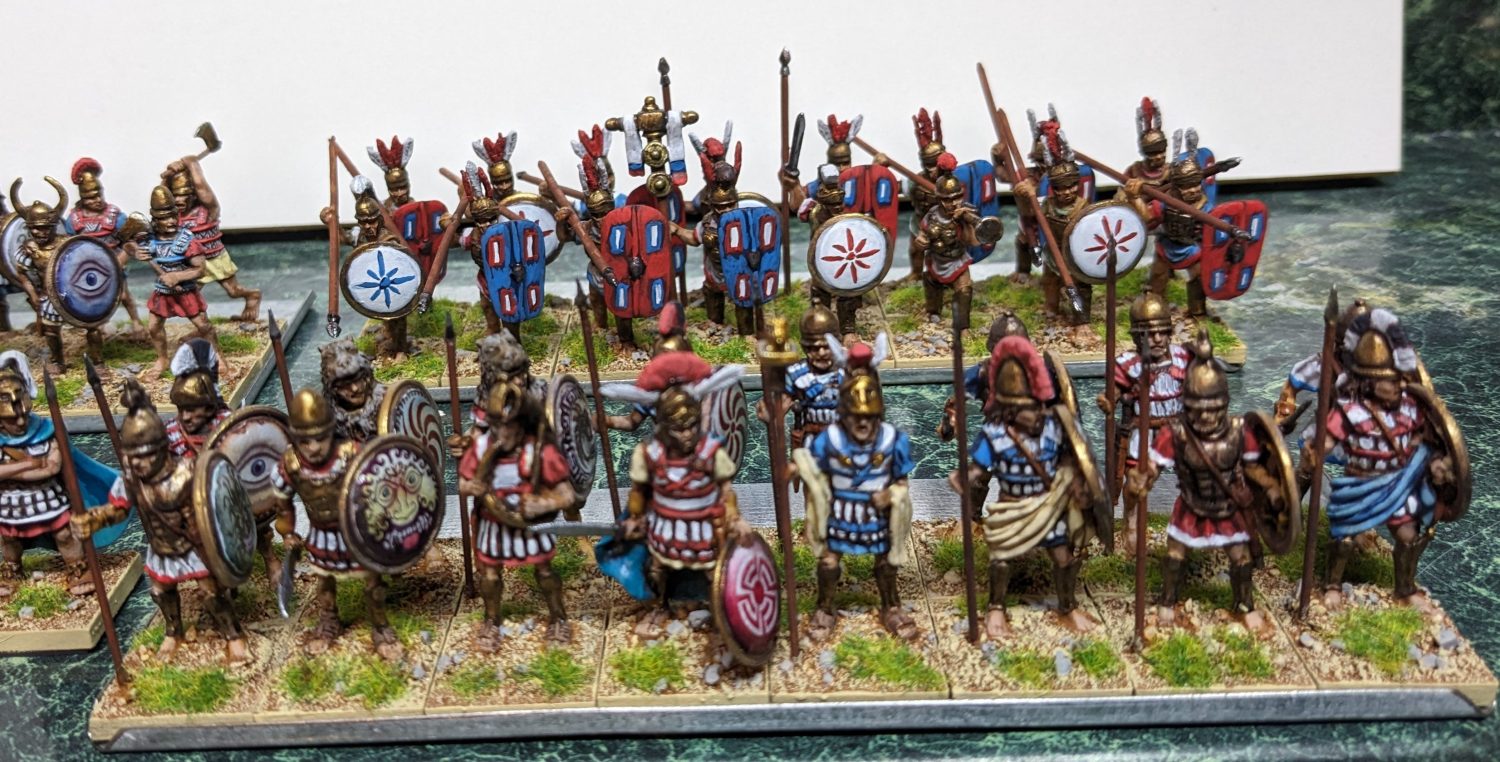
I hosted a Hail Caesar game – The Battle of Metaurus, at the Little Wars Convention. The facility was bright and quiet enough to have a good conversation. The vender hall was part of the ballroom and easy to get to. Parking was readily available by the main doors. A contrast to the crowds at Adepticon when I visited last month.
In this Punic Wars battle, Hasdrubal, younger brother of Hannibal, marches a fresh army of Iberian Mercenaries and Elephants into northern Italy. Rome is desperate to intercept the army and prevent the brothers from joining up. The commander of the southern forces force marches half of his army to the north, and together they confront Hasdrubal at the Metaurus river. During the battle, the Roman right flank is blocked by an impassable ravine, and so the Roman commander takes half of his forces and marches behind the battle lines to attack the left flank. Ultimately, the Romans roll the Punic flank, and it ends rather badly for Hasdrubal. Did history repeat itself?
I said a game, but it was actually, two battles. Game 1 with 4 players and Game 2 with 7 players. Both games played to the time limit of 3 hours and 4 turns. Game 1 was a strong victory for the Punic forces with both mission goals accomplished and a strong position on the battle field. Game 2 was a marginal victory for the Punic forces with one goal accomplished and no clear winner on the battle line.
The games were rather exhausting. I was hoping to attract a few veteran players to ease the flow of the game, but the best we had were a few Black Powder players. Needing to supervise every move and every battle over the 6 hours wore me out. I certain that more than a few rules errors were made, but every attempt was made to keep the game flowing. In retrospect, much of the playtesting for the game was versus my experienced opponent. However, our methods and tactics did not apply to a group of rookies. Changes made to the Roman forces (Hastati played as medium) to improve balance were not needed. The flanking force of Romans did not appear until turn 3 and did not participate in the battle, leaving the Romans short handed. As a take away, I want to take a second look at To The Strongest and see if it will be a faster/easier convention system in the place of Hail Caesar.

The battlefield in the morning quiet.

Looking down the Punic lines.
A view across the battlefield.
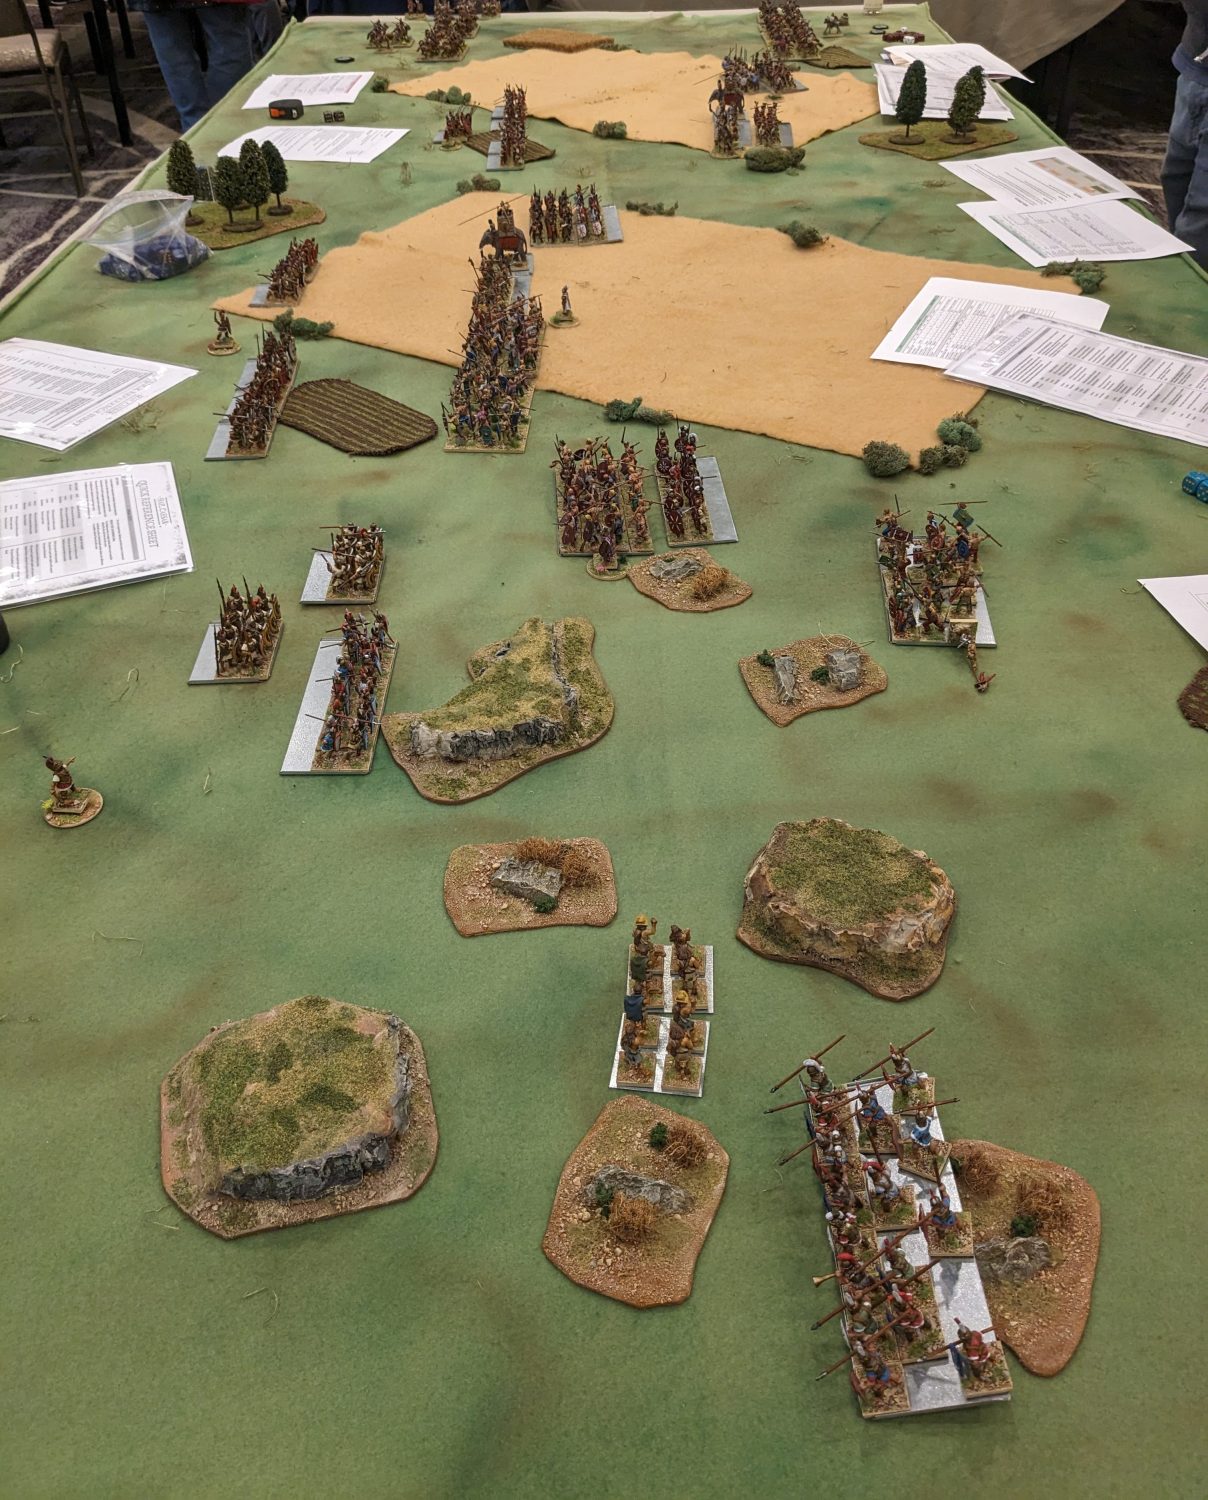

Battle in progress


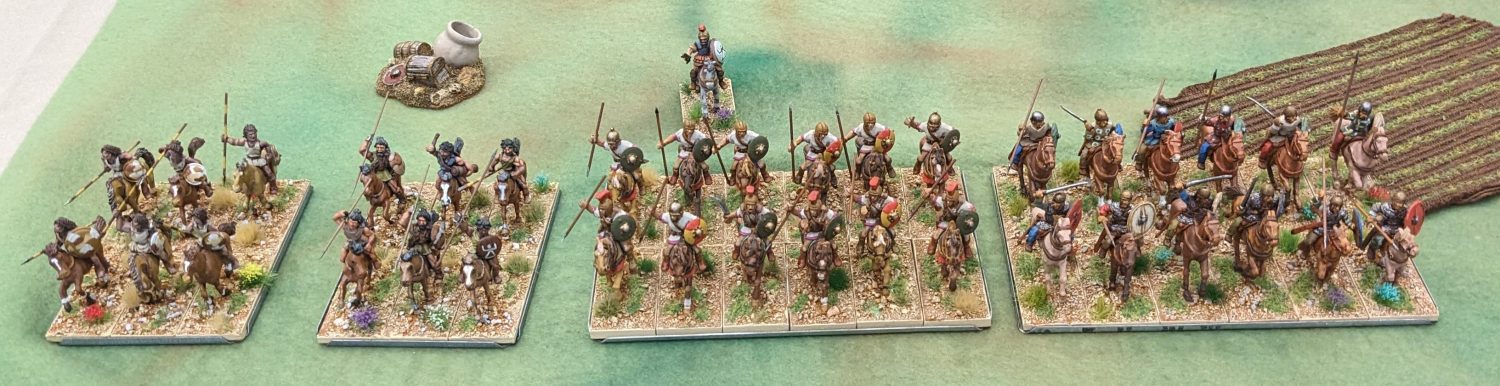
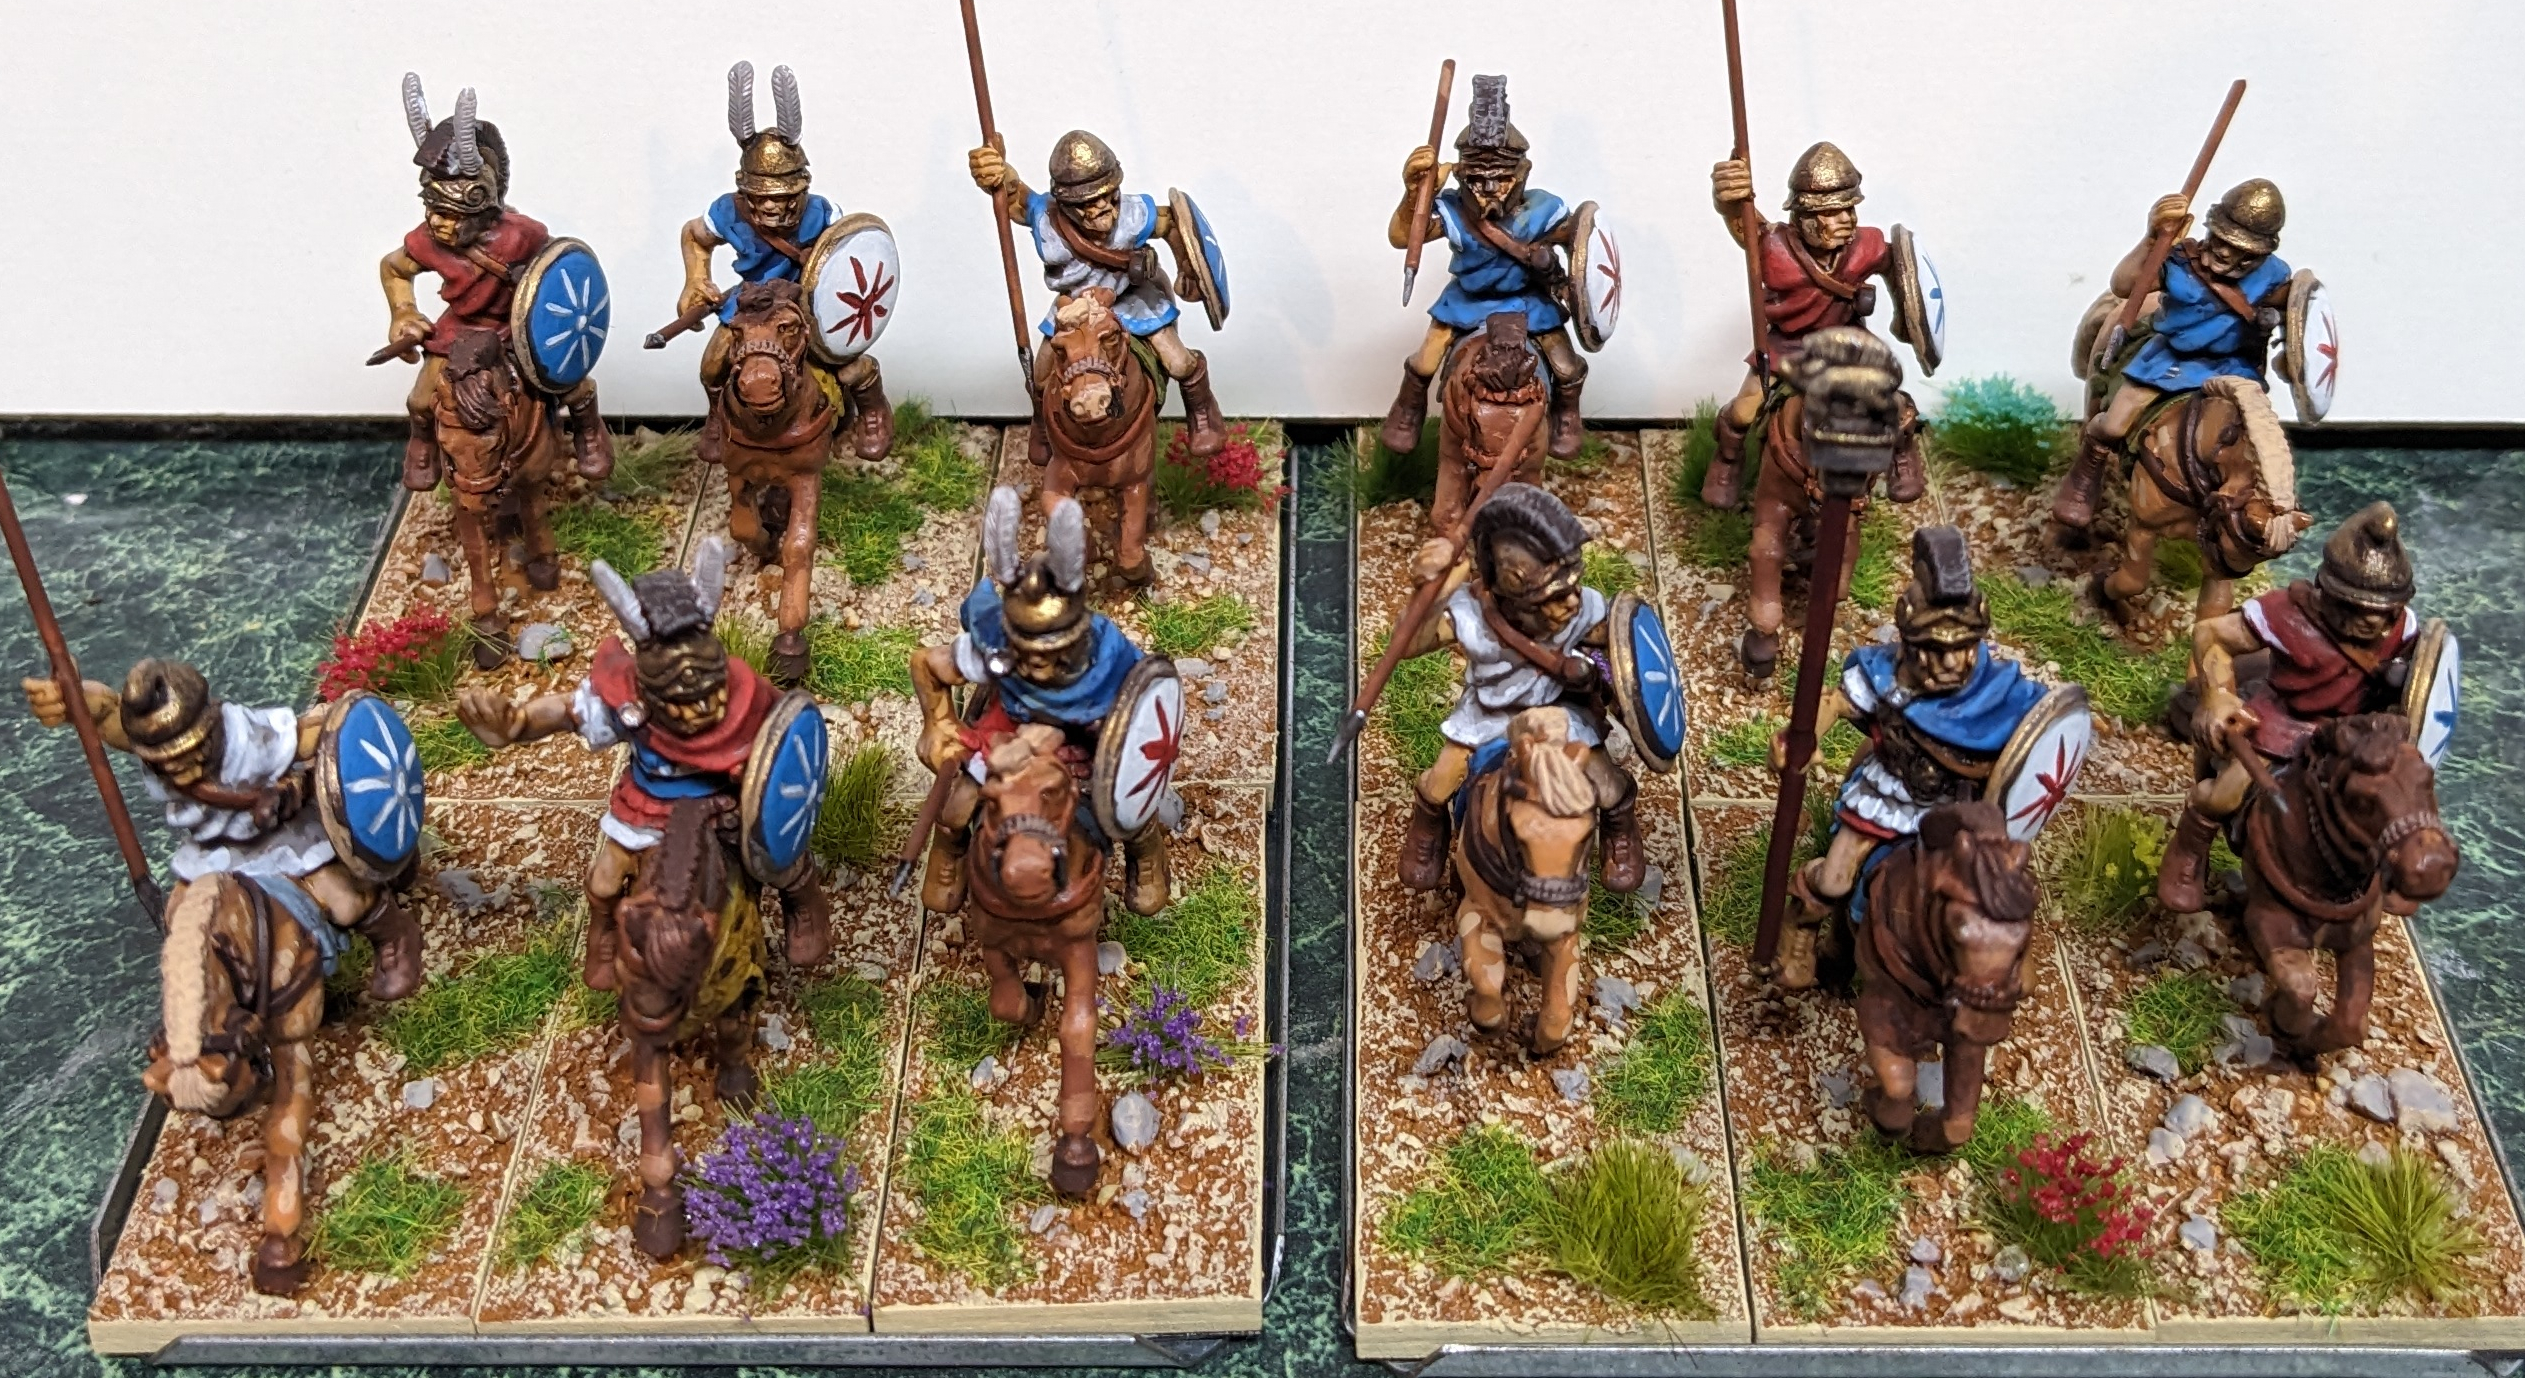
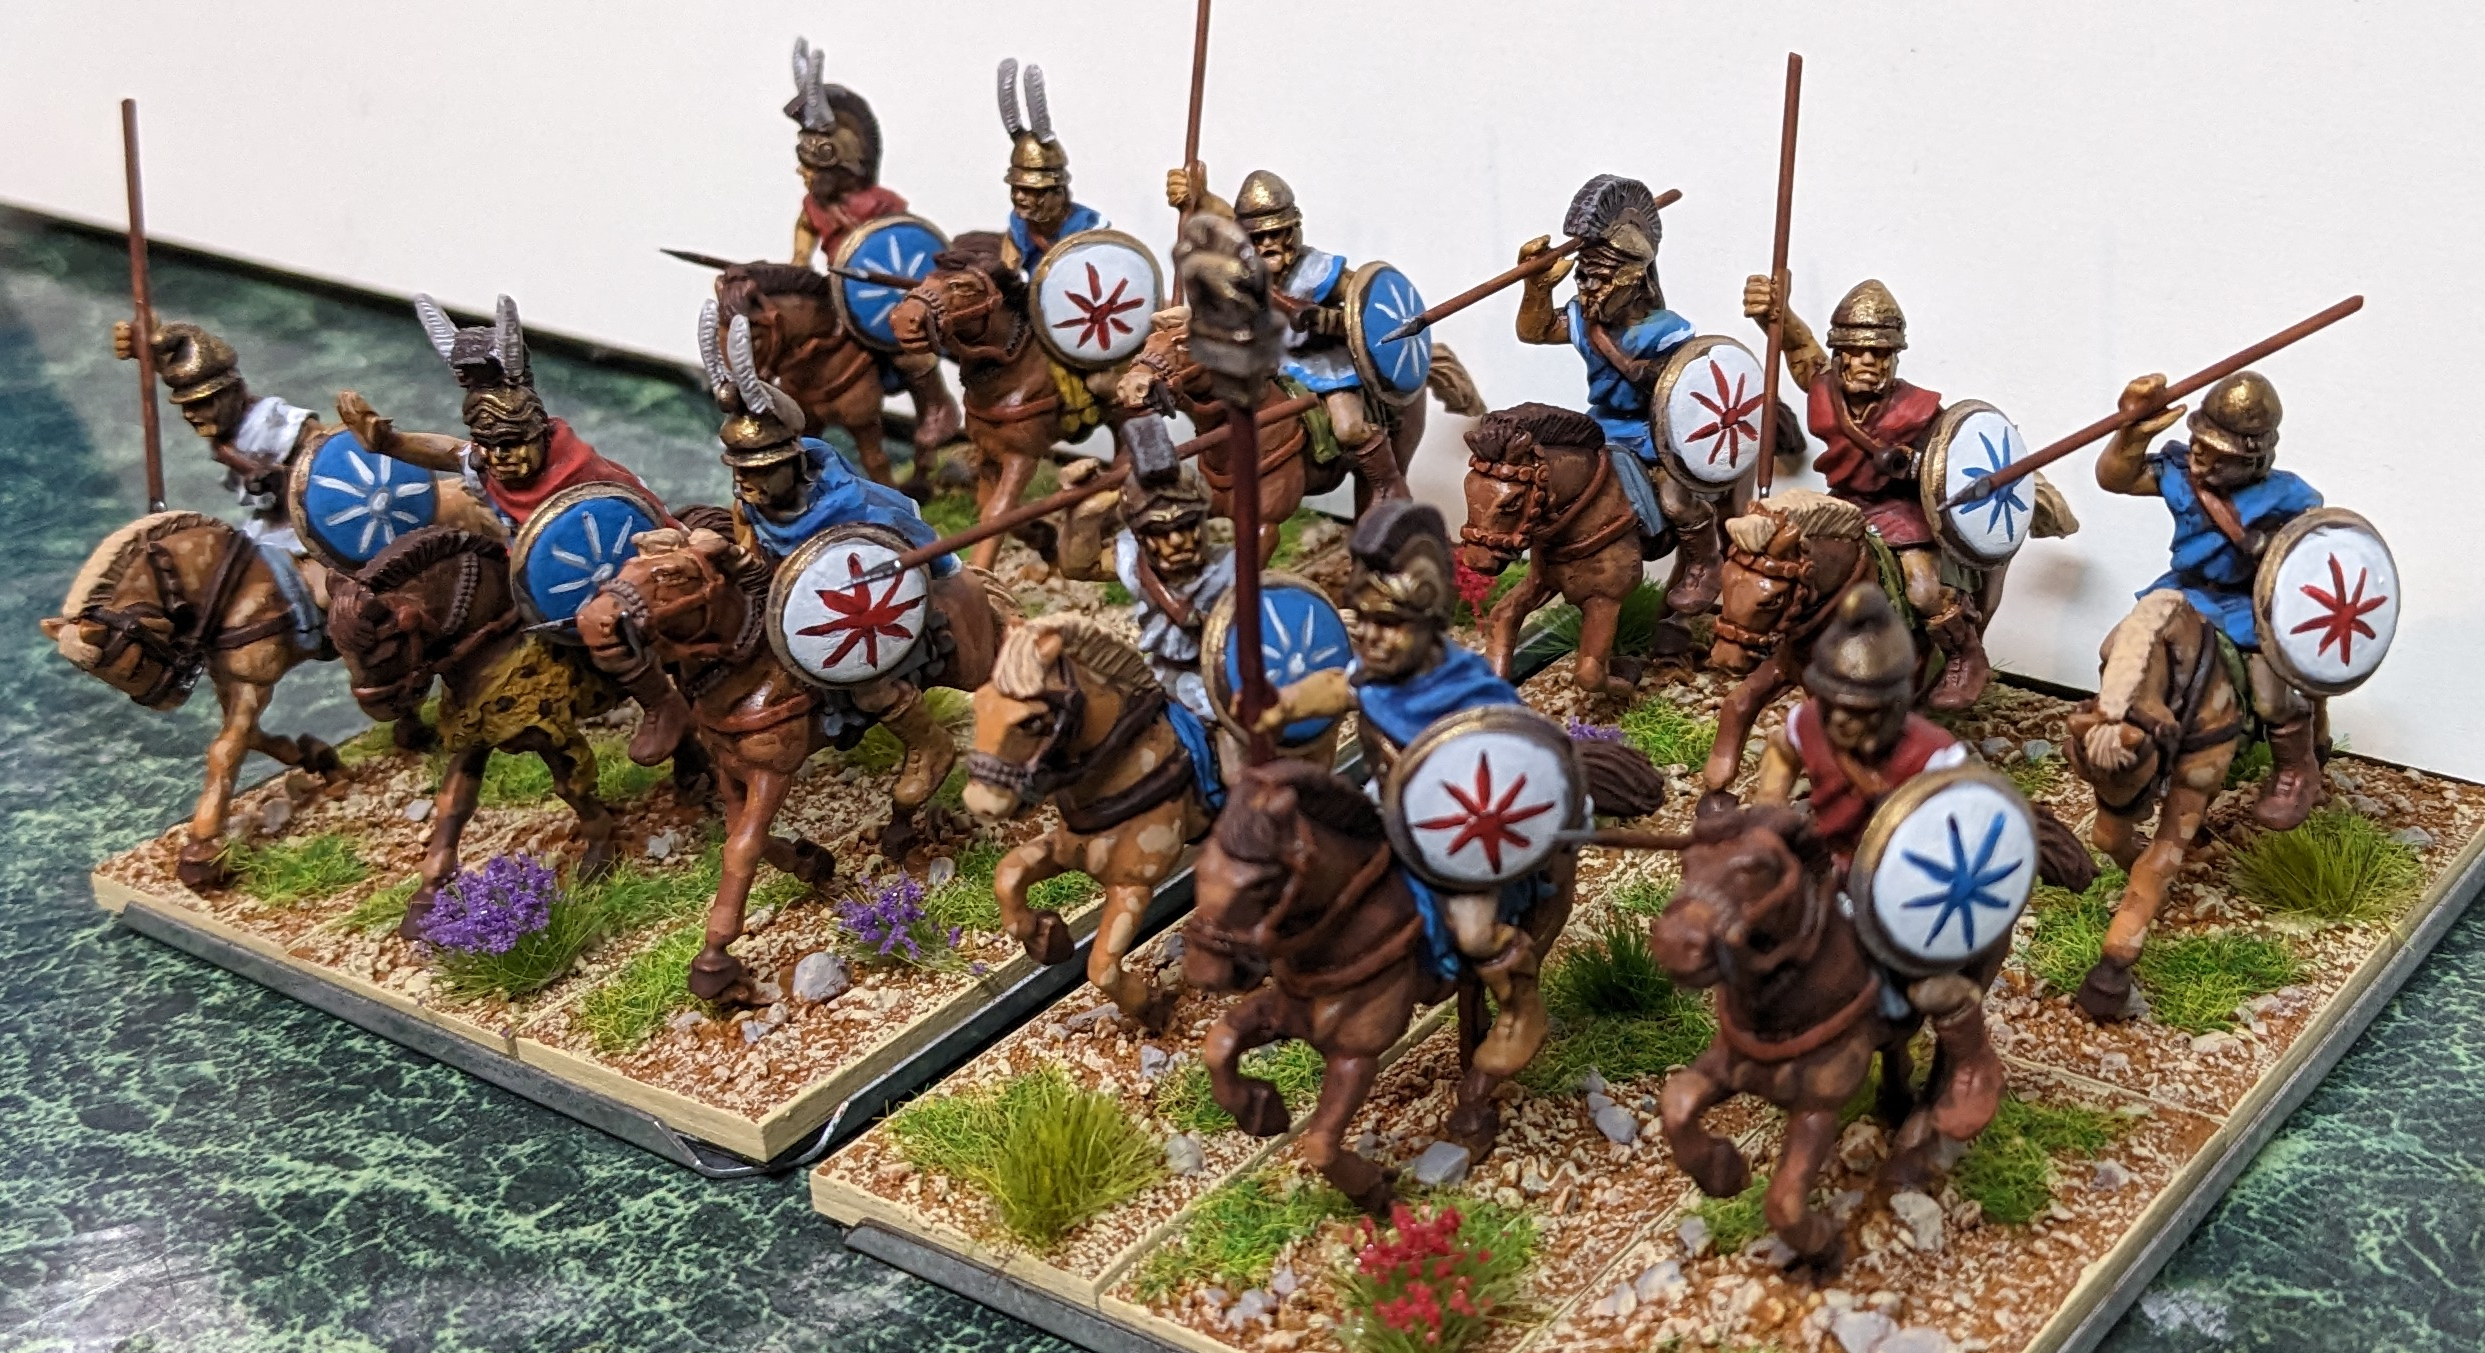
Four Punic Divisions

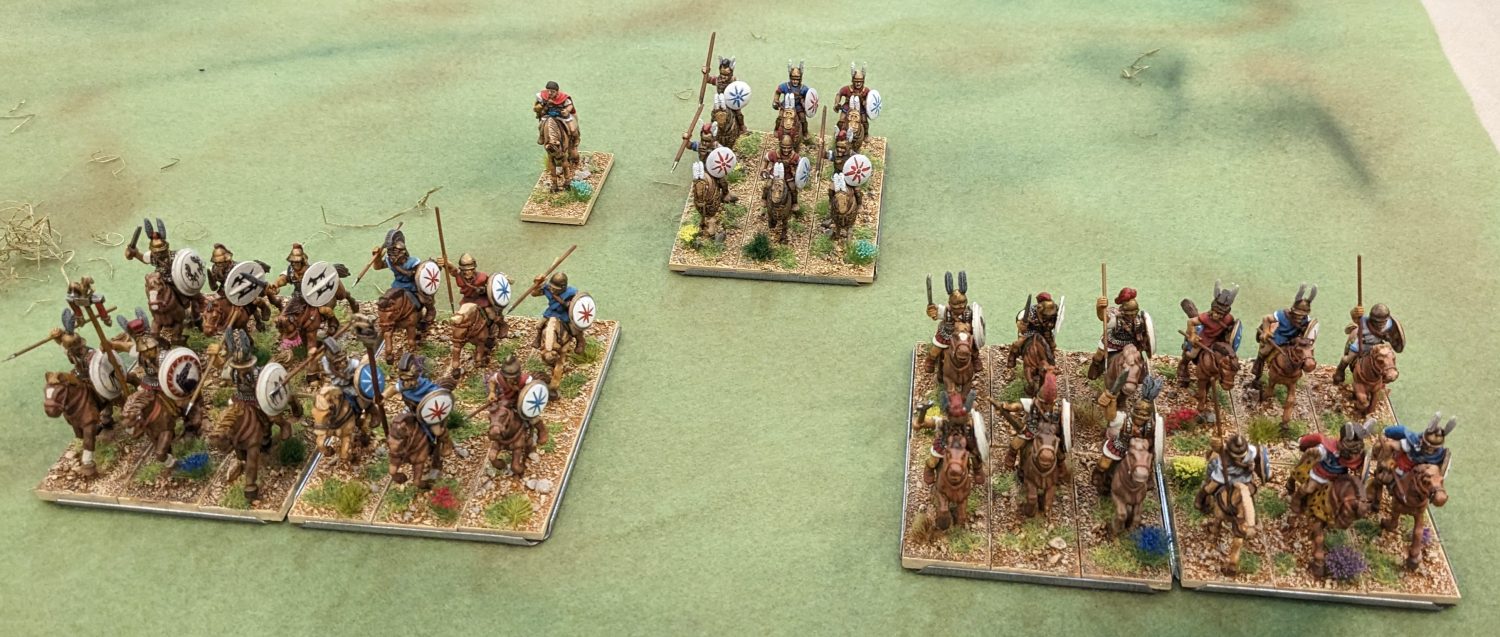


Five divisions of Romans
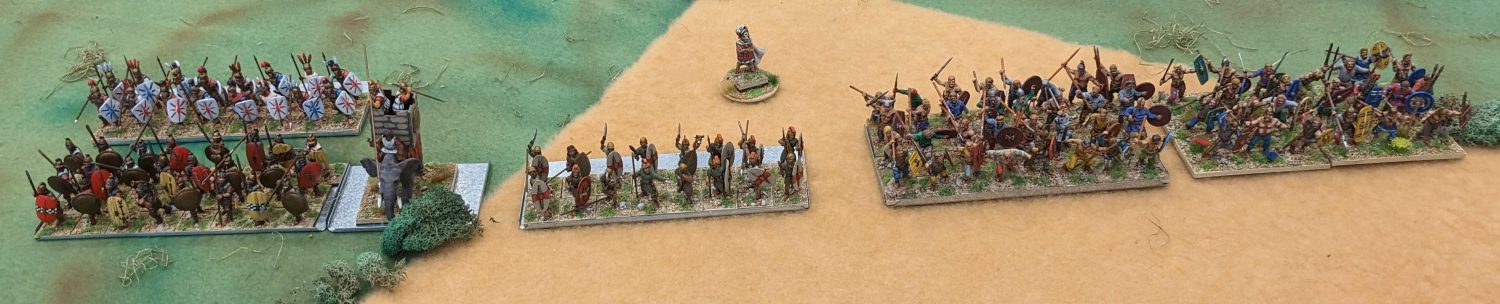
Celt Warbands
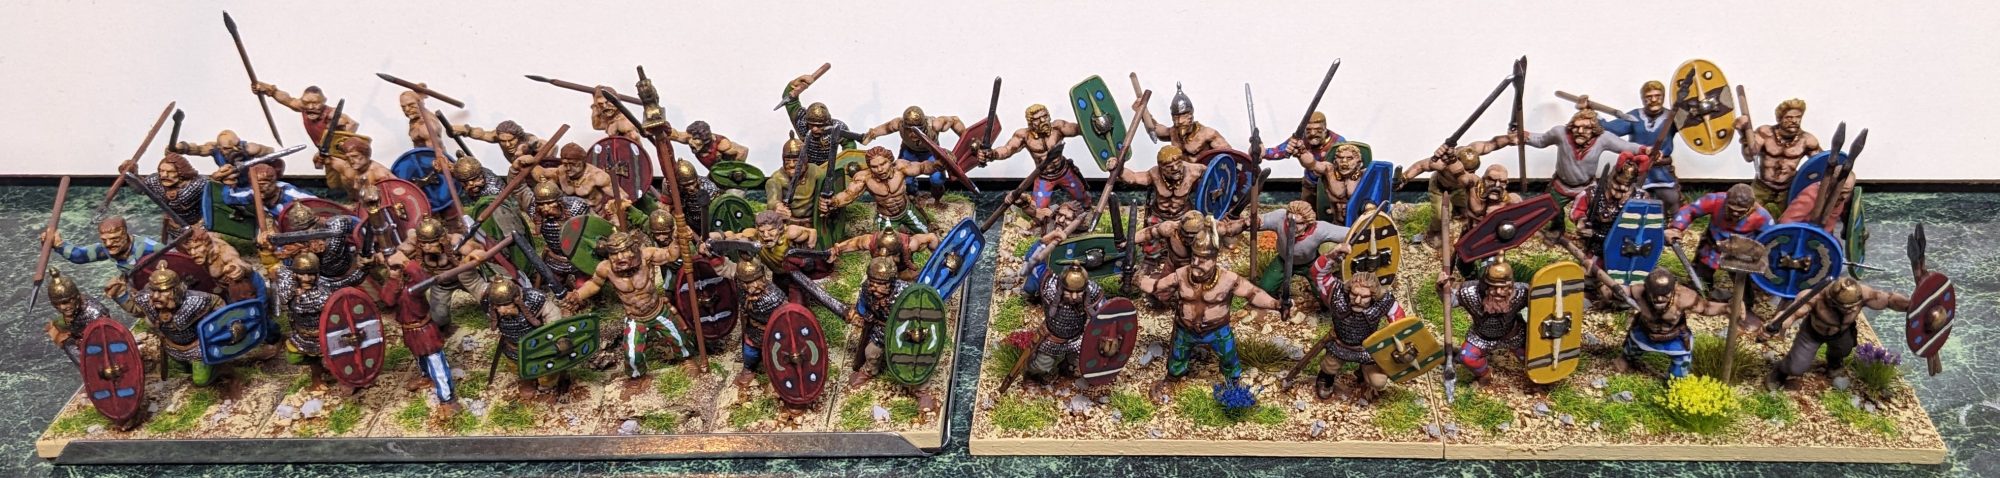
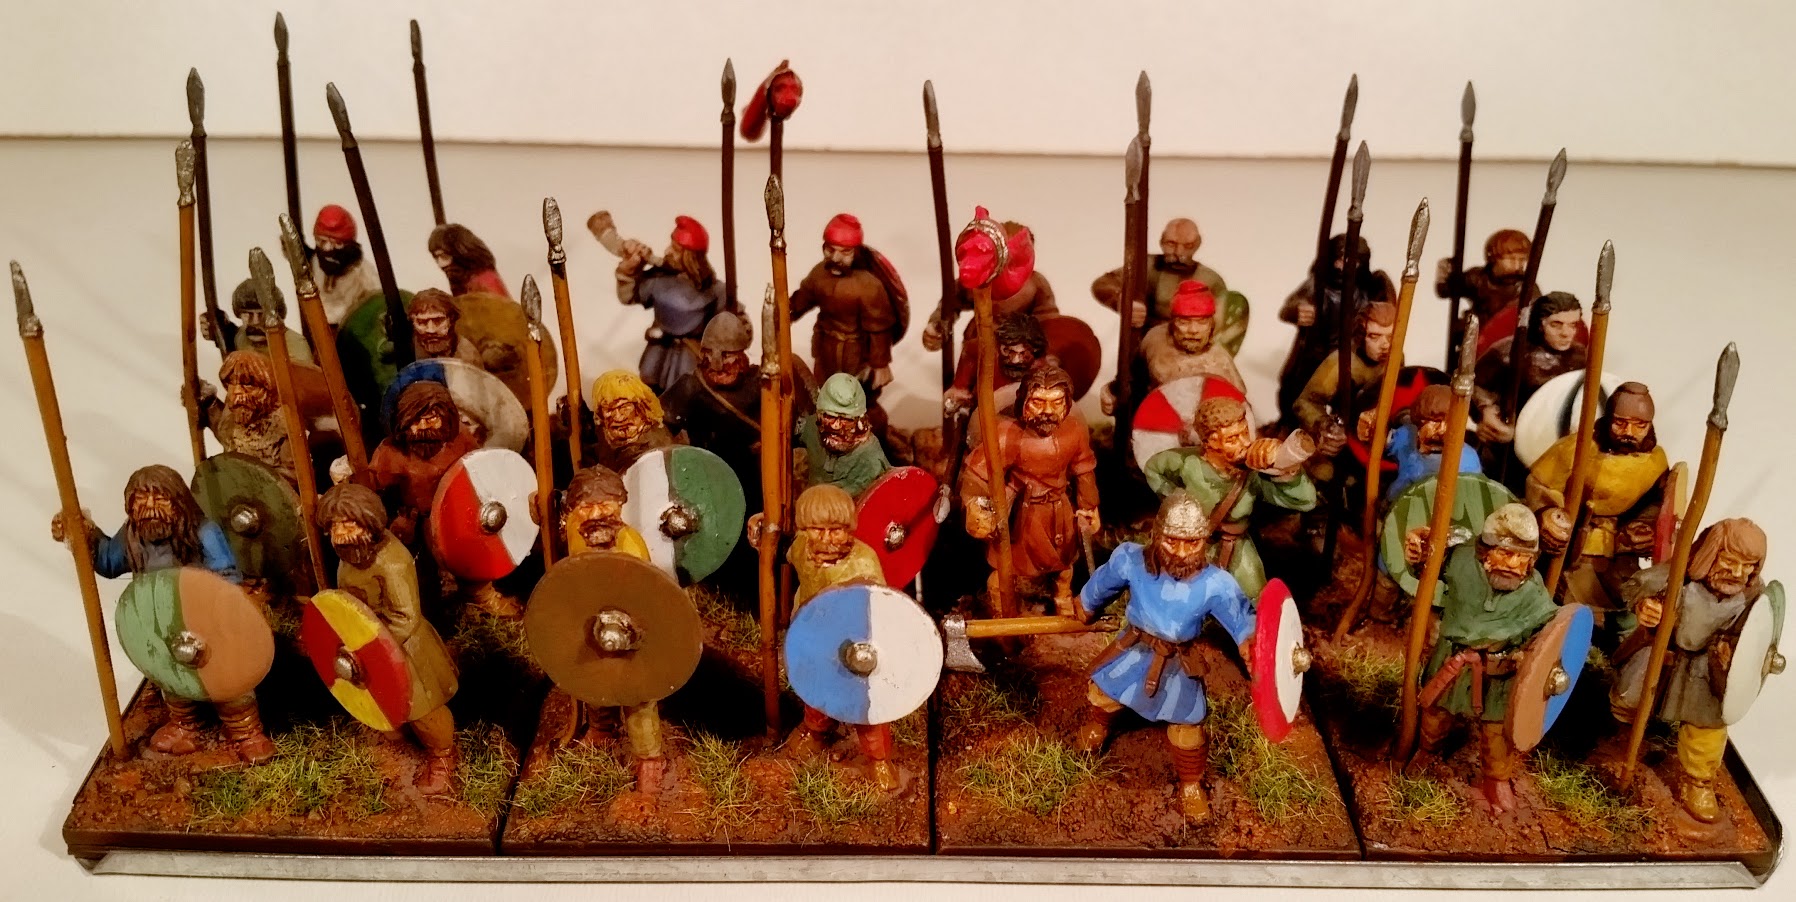
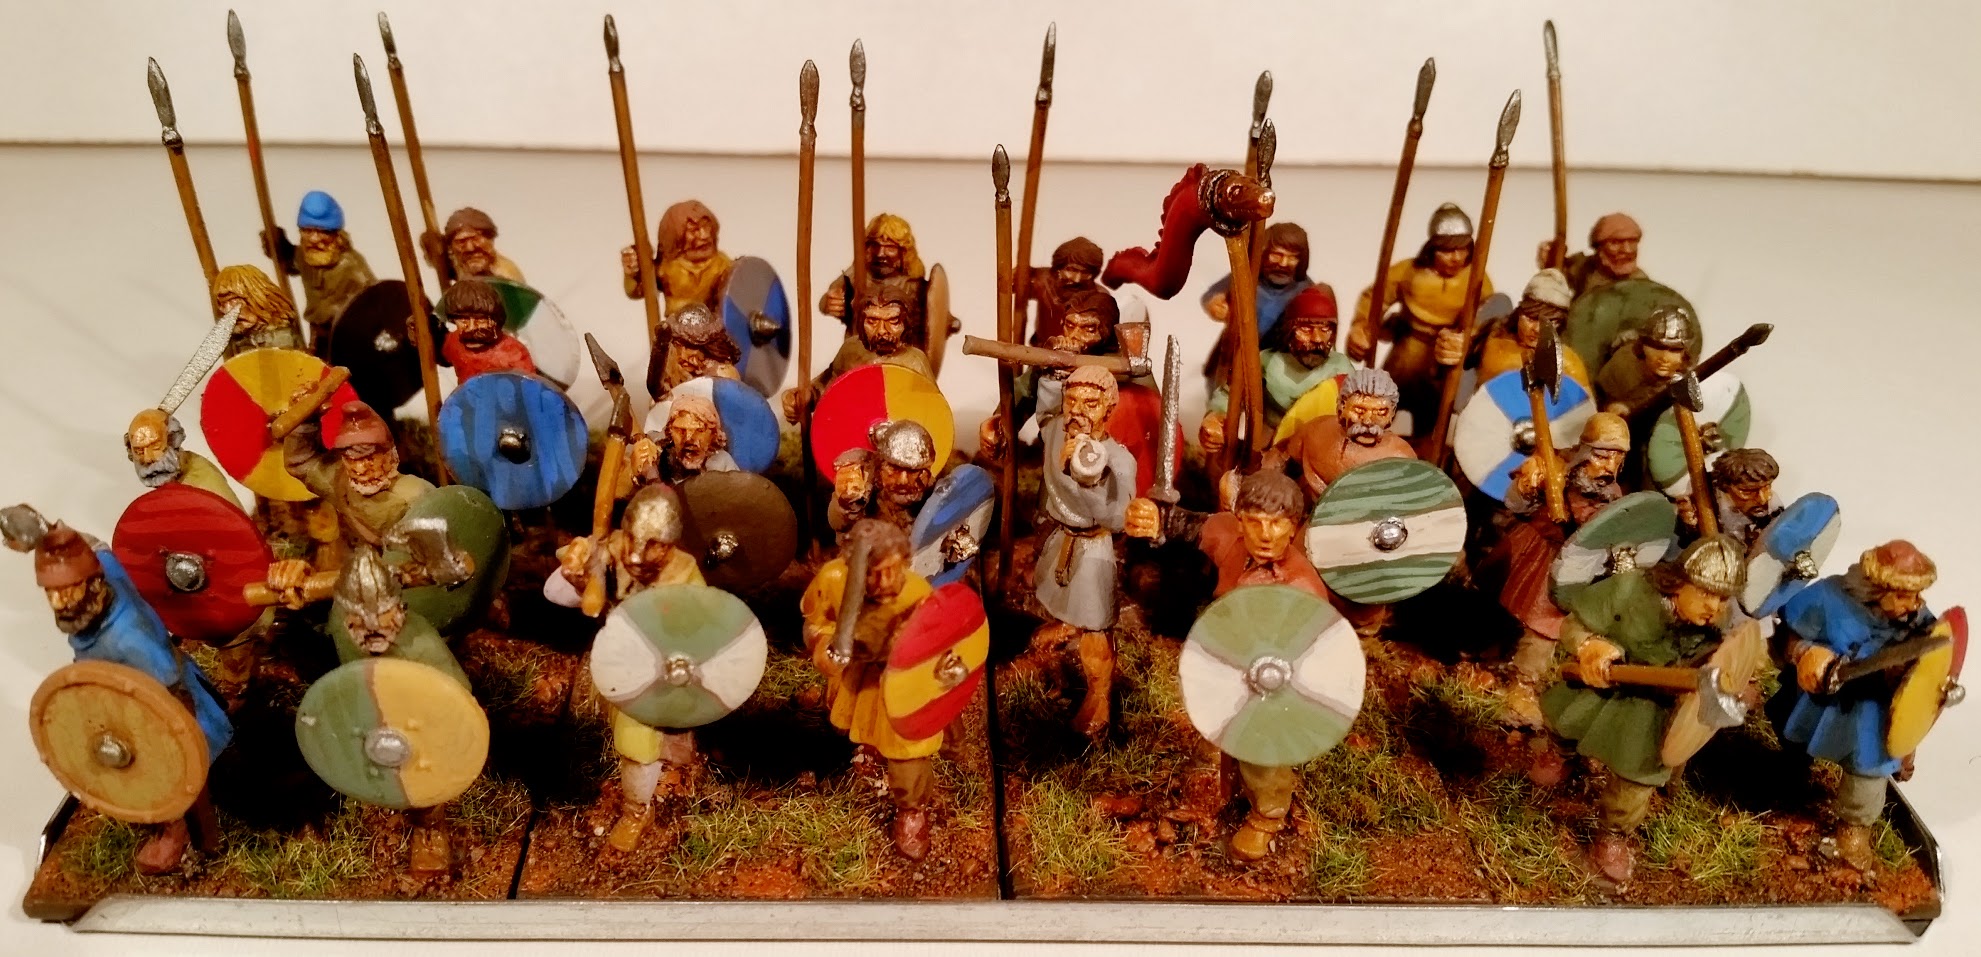
Posted by chicagoterrainfactory in Hail Caesar, miniatures, painting on April 4, 2024
Two Gallic Warbands. The first is a repost from two years ago, but with improvements on the shields. The second is an experiment in large bases – the whole warband is on two bases. The goal was to provide space for these wild Gauls with weapons pointing in all directions, to have more movement displayed in the unit, and finally to reduce the figure count from 32 to 22. What do you think? Does the large base work compared to the traditional unit of individually based figures?


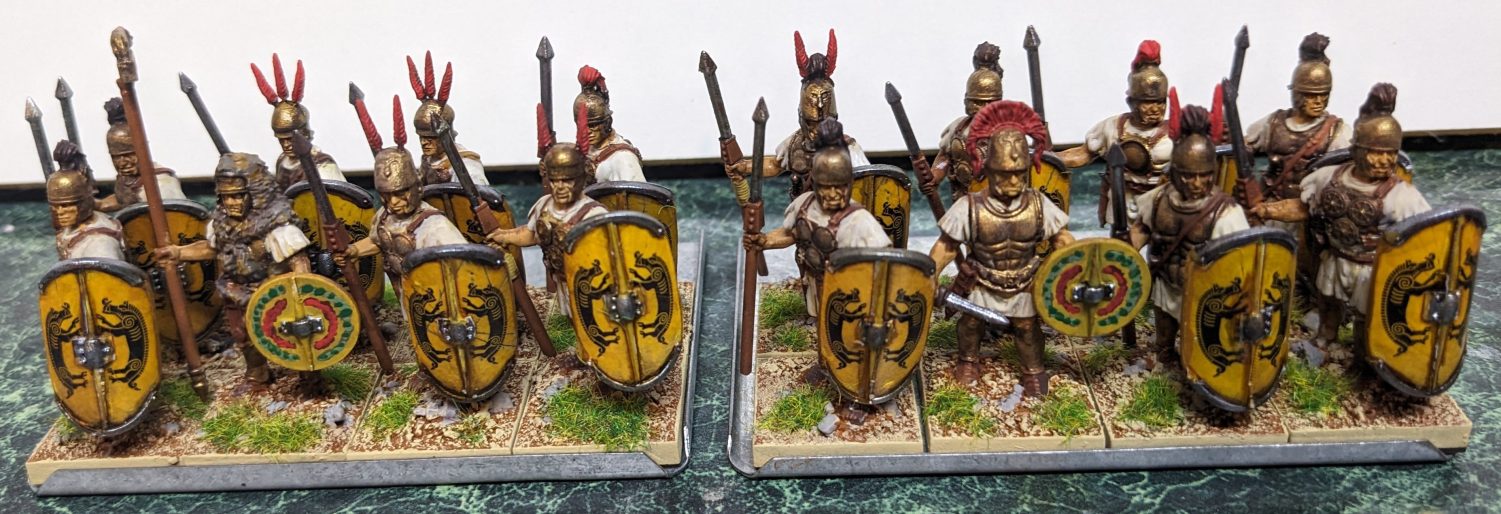
Etruscan – 1st Division Complete
Posted by chicagoterrainfactory in Hail Caesar, miniatures, painting on December 8, 2023
First Division of the Etruscan army is complete!


Arranged for the Hail Caesar rule system: Etruscan 2nd class, Army General & Division Leader, Etruscan 1st class. Etruscan 3rd class, Axe Men, Etruscan 3rd class.
Agema Command for the 2nd class unit
Funny story. I was building the 2nd class unit, and finding myself short 4 figures to make a 16 man unit. I kept wishing that I had purchased the command squad for 2nd class. Digging in the lead pile, I found a old command squad from Agema that I had purchased pre-kickstarter. Turns out, they are from the same dolls that the 2nd class command were made from and the figures fit right into the unit without issue!
A Gorgon Etruscan as Division Leader.

Agema Snake Priest

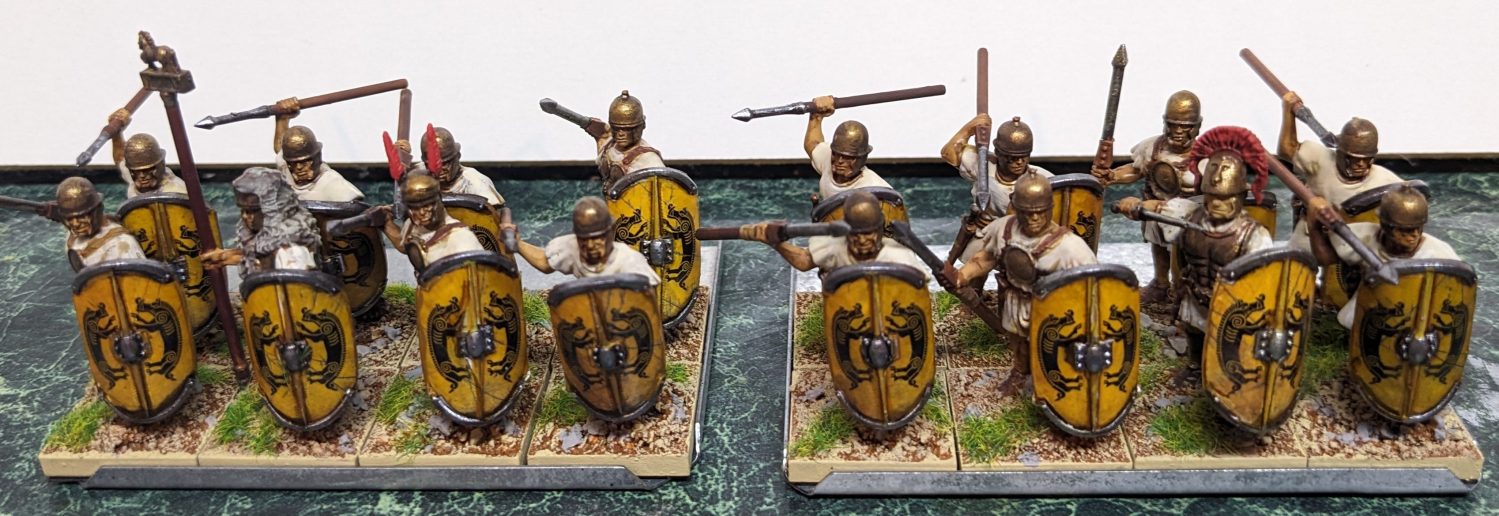
Victrix Italian Allied Legion
Posted by chicagoterrainfactory in Hail Caesar, miniatures, painting on July 17, 2023
Italian troops drawn up in Roman style with Hastati x2, Principes x2, Triarii, and Velites. Shield transfers by Little Big Men.
Legion:
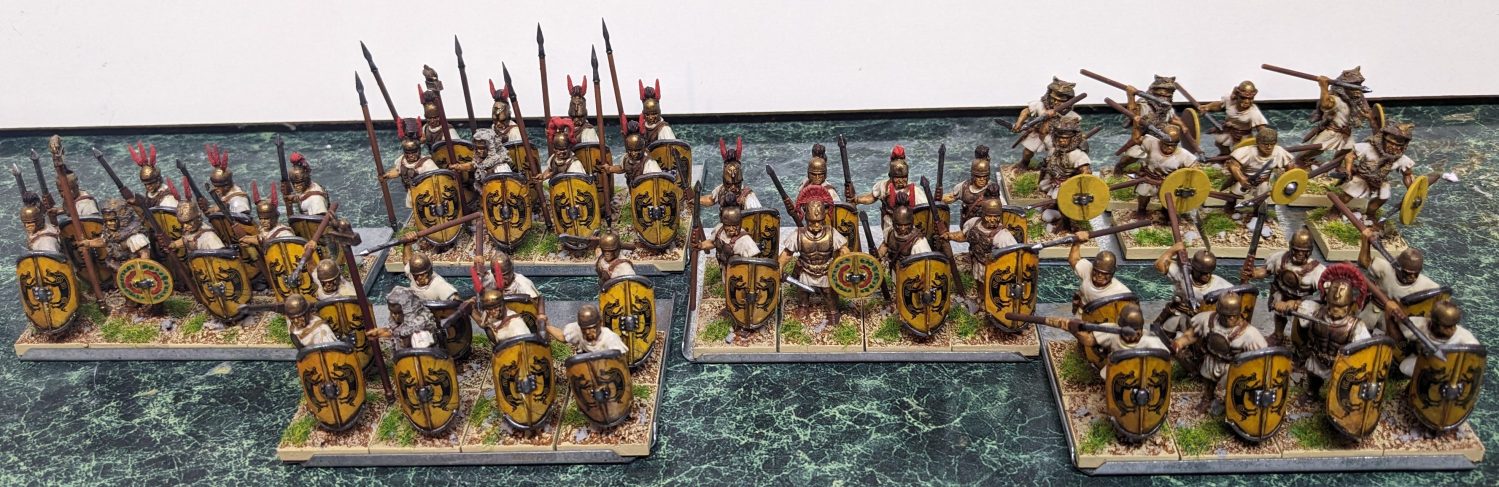
Triarii and Velites:

Hastati:

Principes:

These guys sat on my paint table for most of Covid. The division was assembled and half painted when everything ground to a halt. With the resumption of gaming, the final units were completed over the past months.
Paint Plan:
Tunic: Foundry Raw Linen, Raw Linen light, Yellow Bone w/white. (earlier figures included a soft tone wash over the linen, but this was discontinued with the later units)
Shield: Leather Brown, NMM Gold Base
Armour: Scorched metal, Tarnished Bras with Dark Sepia wash
Shield Detail: Grass Green highlight to make the wreath pop
Here comes the cavalry
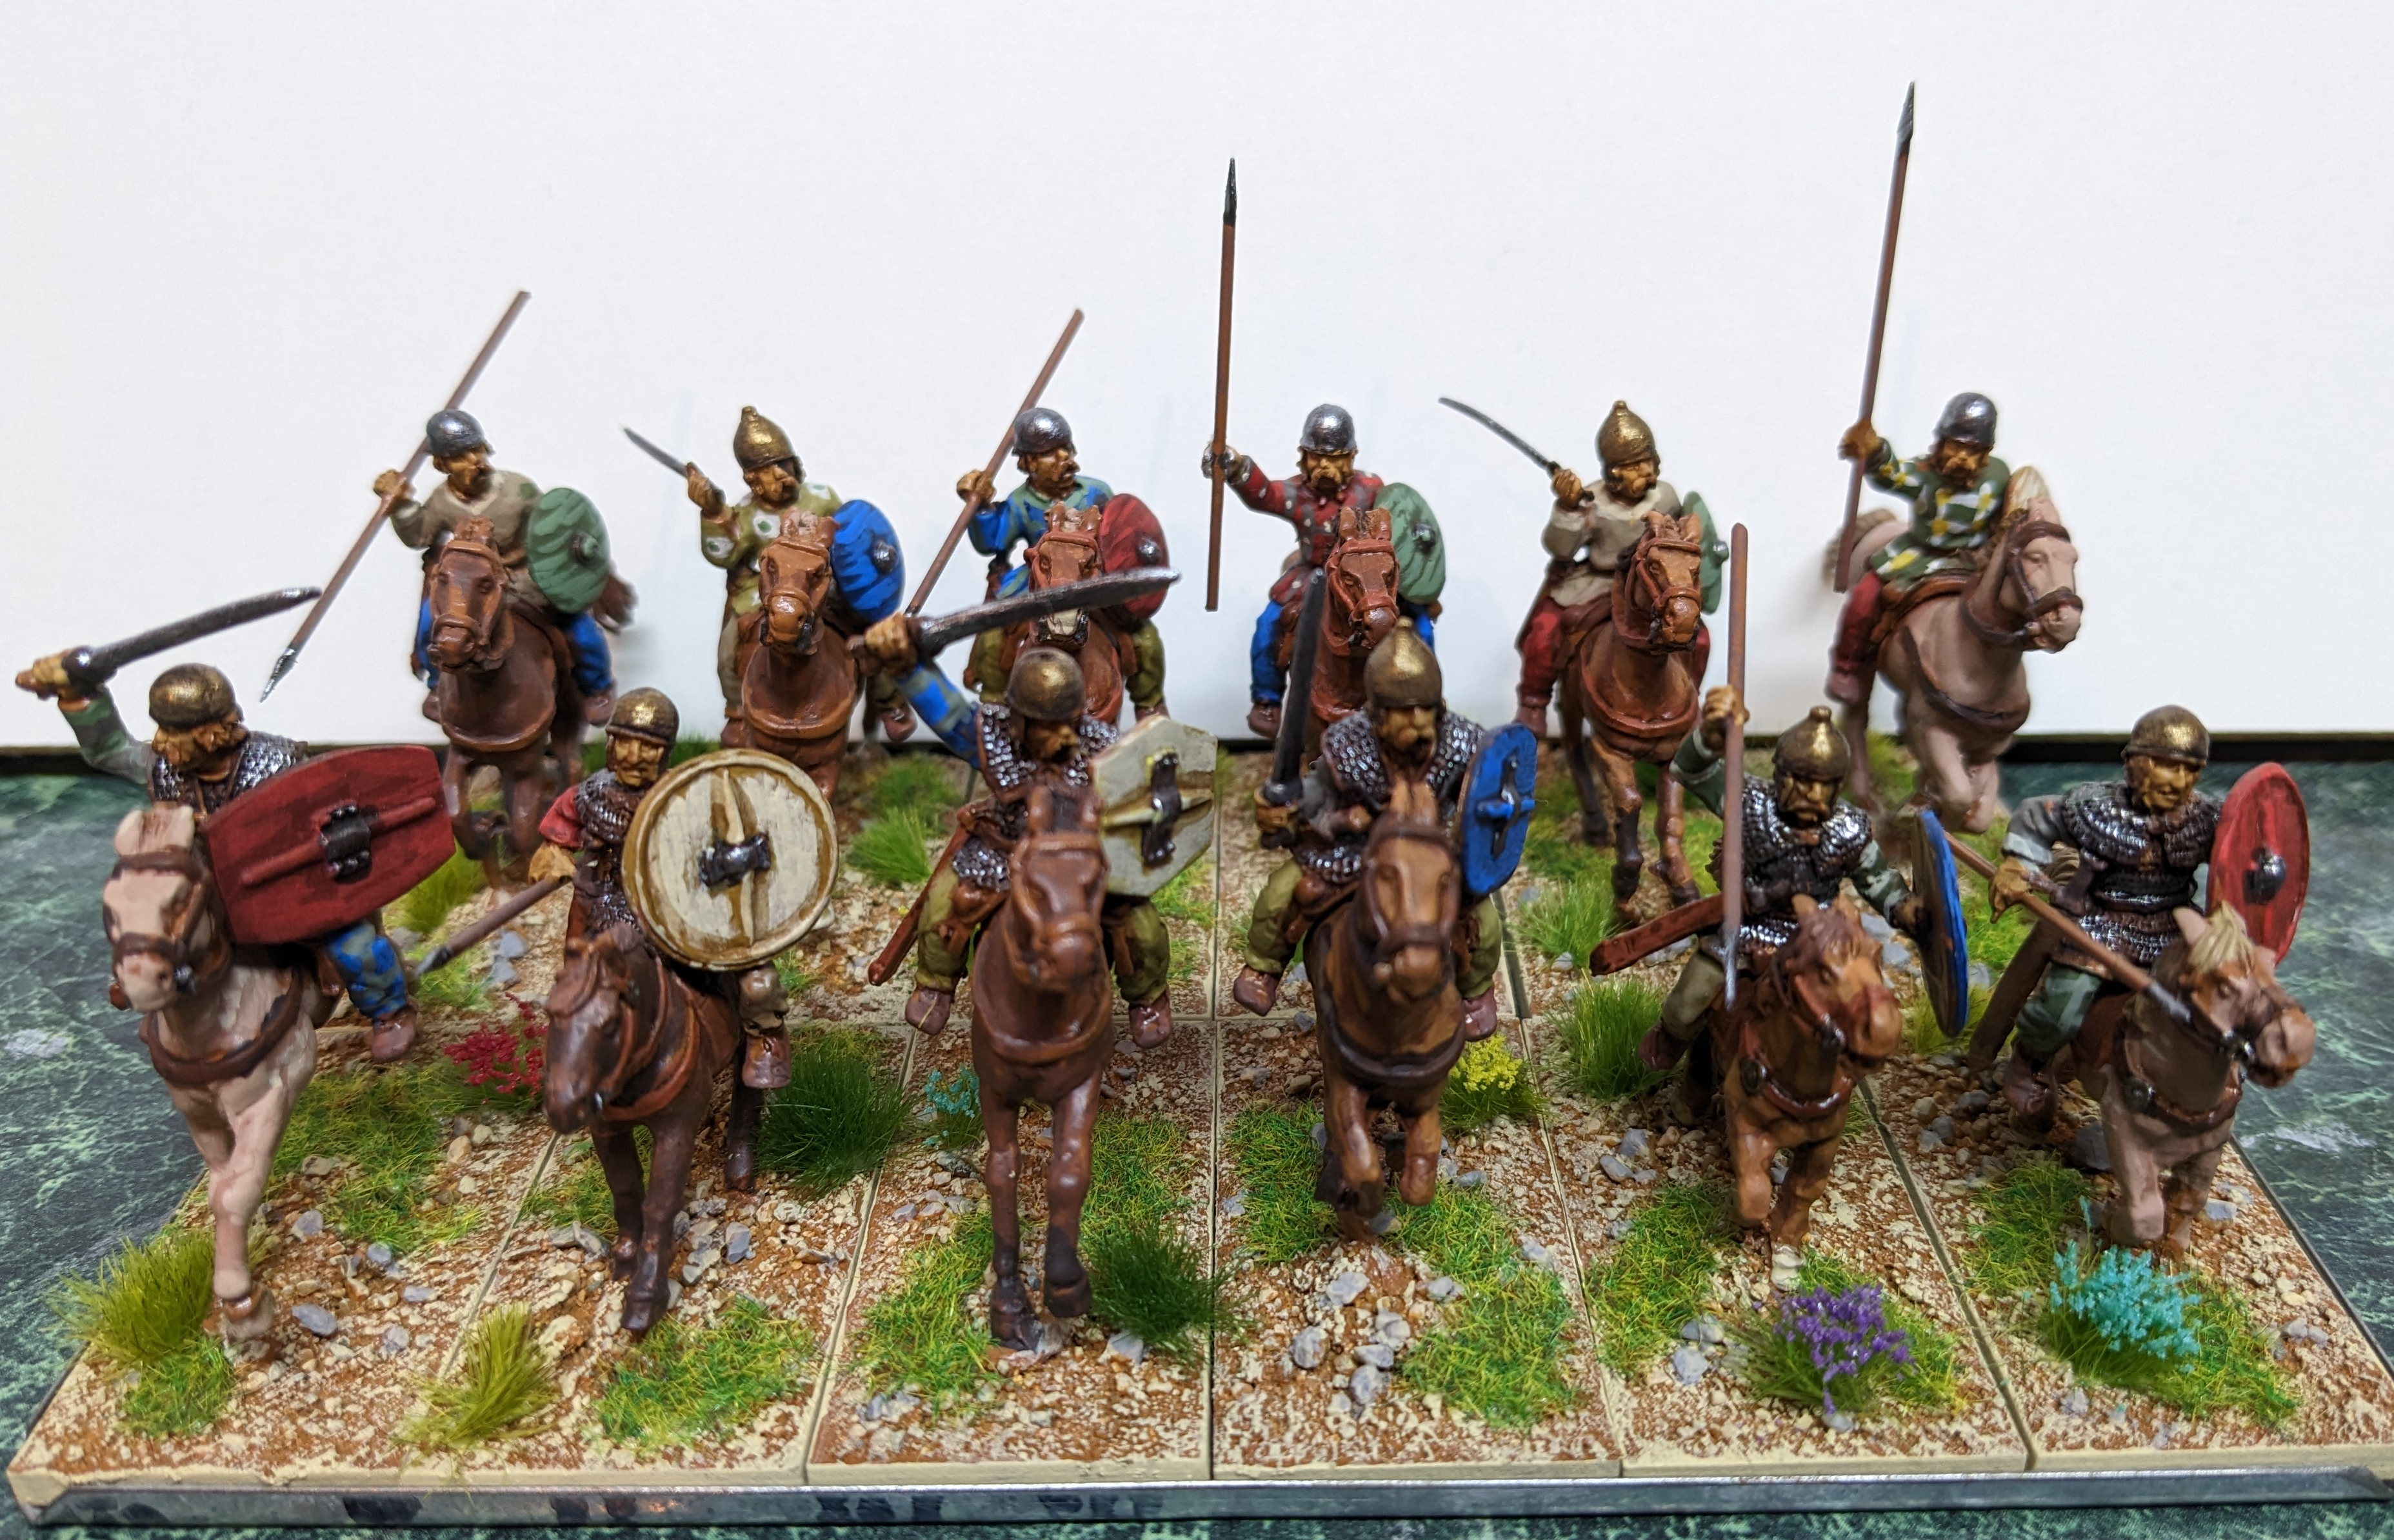
Posted by chicagoterrainfactory in Hail Caesar, miniatures, painting on March 5, 2023
Three new blocks of cavalry for the Punic Wars: Gallic Cavalry, Numidian Cavalry and Allied Italian Cavalry. (The left hand Numidian unit was purchased painted. Only the basing is mine.)


Italian Paint Plan:
Whites: Bastion Grey, Wolf Grey and Solid White
Blues: Exile Blue and Tropical Blue.
Red: German Red Brown and Rouch Red
Yellow: NMM Gold Base and plague brown
Skin: the normal skin method of Middle Skin with Soft tone was coming out more yellow than normal. I added a highlight of Warrior Flesh on the to lighten up the tone.
Next Up: Republic Romans
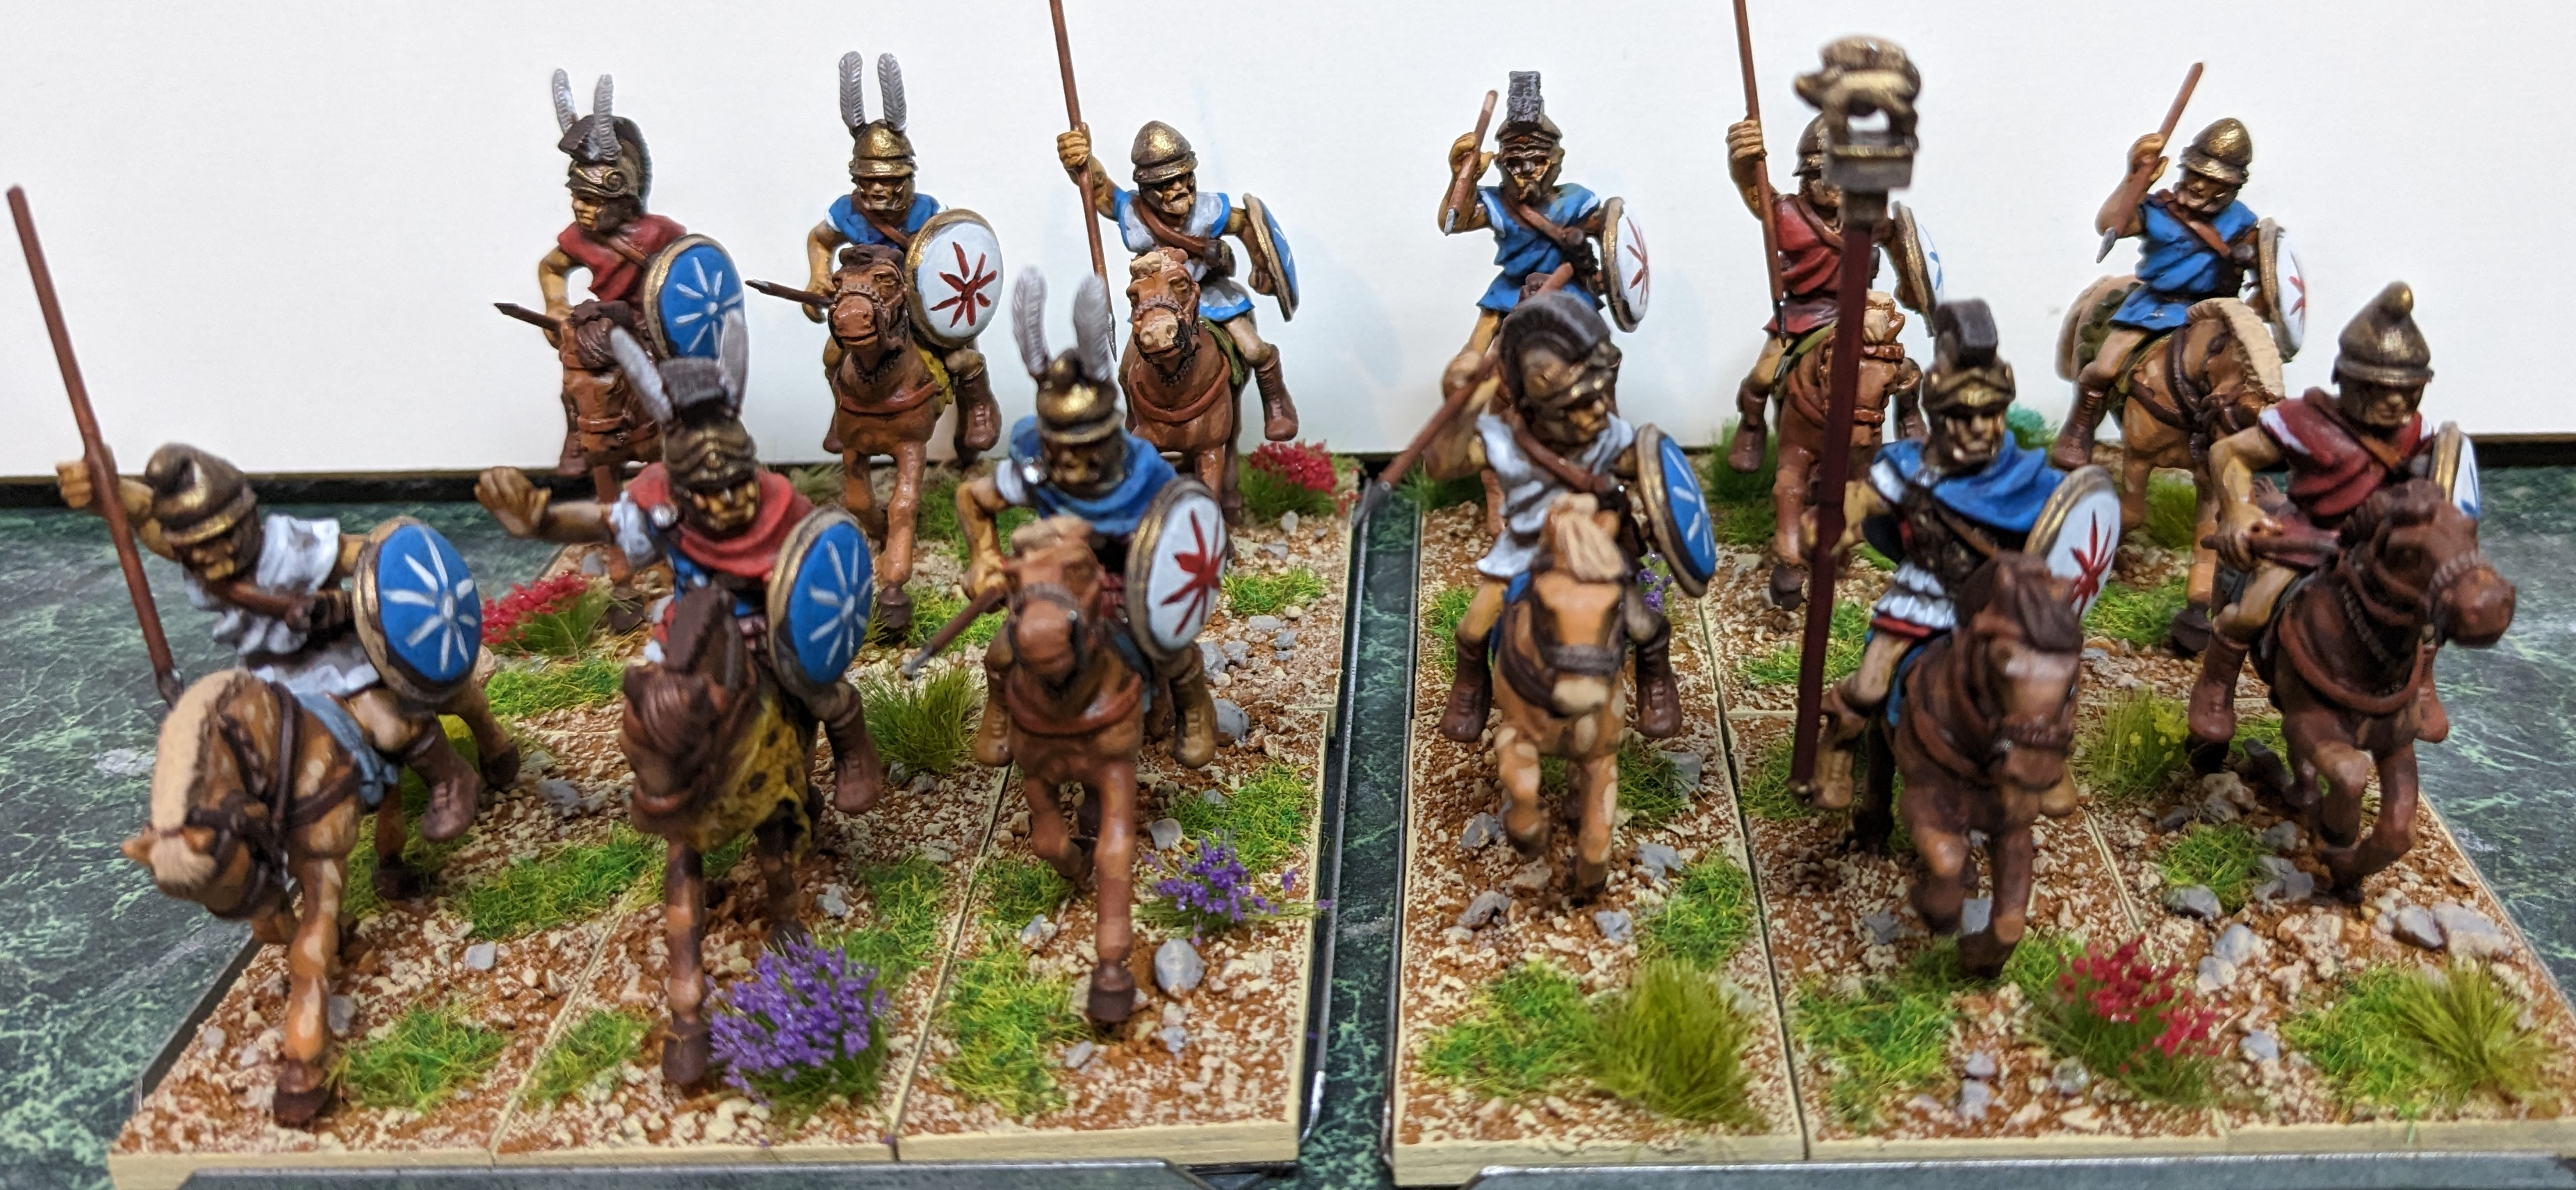
Posted by chicagoterrainfactory in Hail Caesar, miniatures on May 21, 2017
This summer I will be returning to a favored project which I was satisfied with: The Roman Republic. This linchpin of the period fights with or against a host of opponents: Carthage, Spain, Samnites, Etruscans and Greek/Macedonians. First up is a box of Agema Republic Romans. The delicately sculpted figures provide a full division of Roman warriors with 2 Hastati, 2 Principes and 1 Triarii. Assembly was smooth, but I wish that they had provided a neck socket instead of a flat join between head and body.

Norman Knights
Posted by chicagoterrainfactory in Hail Caesar, miniatures, painting on July 31, 2016
“New” style Norman Knights from Foundry. The figures display a few sculpting flaws (rough faces, sword hilts missaligned with scabards), but nothing that stops the figures from taking their place on the table top.

The ground work on the figures features grass tufts from Gamers Grass. I rather like the tufts, the clumps are well formed, distinct and sturdy. Tufts I’ve used in the past were thin and arranged like a spider’s web on the contact paper.

Harold’s Saxon Army
Posted by chicagoterrainfactory in Hail Caesar, painting, wargaming on June 30, 2016
Harold’s Saxon army from my Adepticon game back in March. Played in 2 ranks each, these figures gave me two divisions with a unit of Huscarls, two units of Coerls (and a small unit of archers not pictured here). Most figures are Gripping Beast with the exception of the commander in purple with horn, which is from FootSore.
I need to thank my friend John, these were originally his figures which he gifted to me as part of his hobby clean out last year. Having all these figures based and base coated saved me a huge amount of time when getting ready for Adepticon.


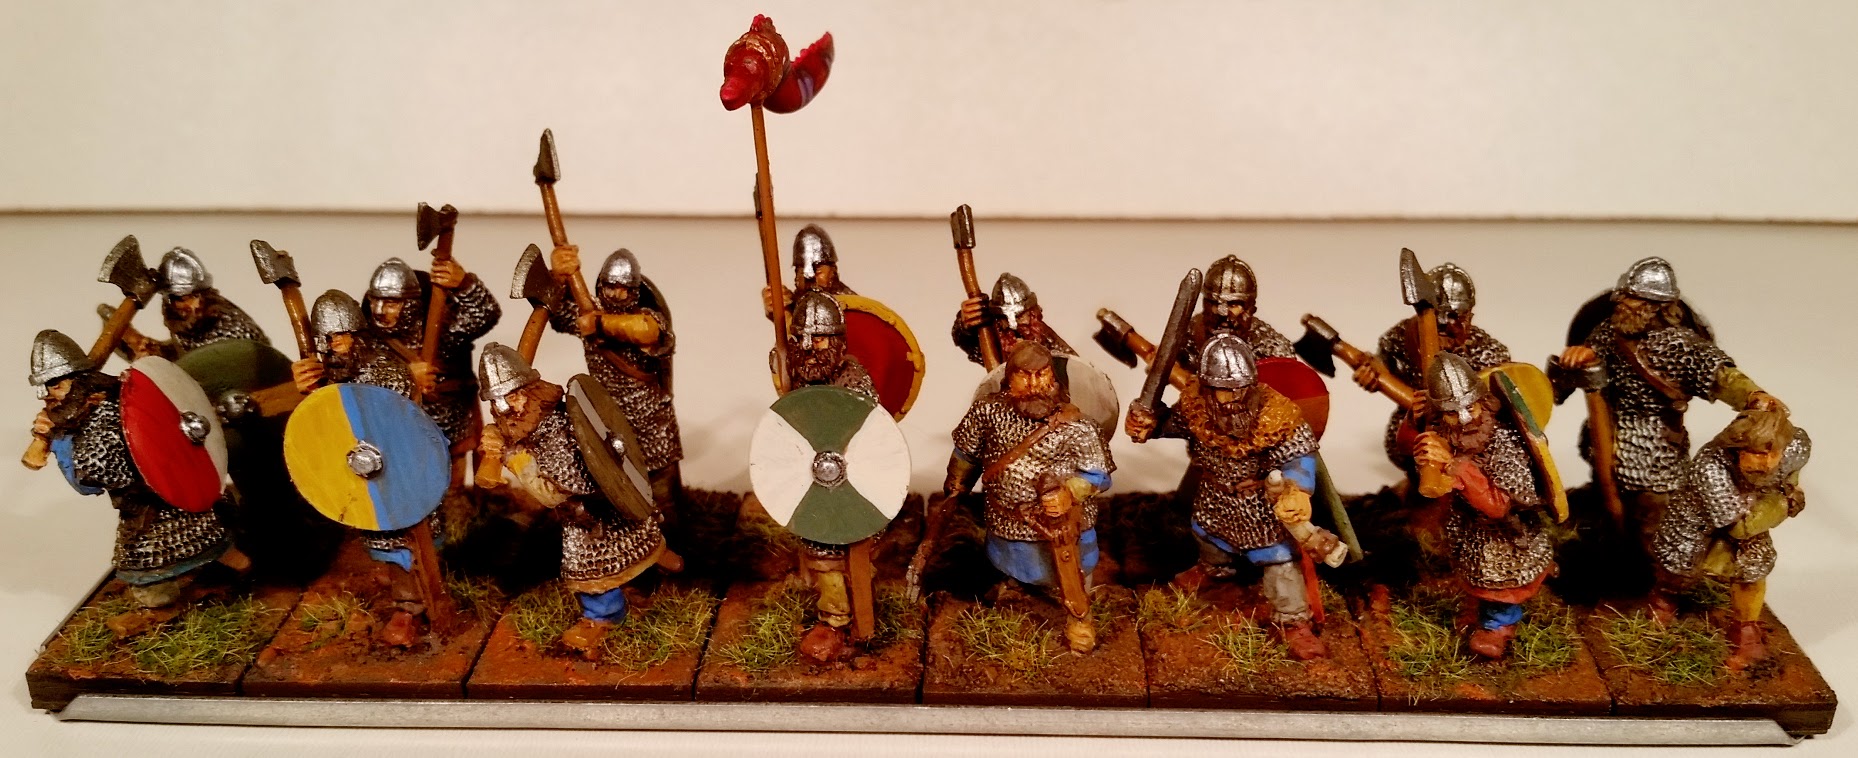
Rather than the lighter shades of my Crusader/Ancients armies, I chose to go with a darker/wetter looking ground effect. Bases are rimmed with Bittersweet Chocolate with a Raw Sienna top coat, then flocked with pasture green grass.
Adepticon: Battle of Hastings
Posted by chicagoterrainfactory in Hail Caesar on May 31, 2016
My third and final Adepticon battle of 2016. The Battle of Hastings was fought in the Saga Hall on Saturday night with copious amounts of wine, women and song (or at least beer and pizza). Nine players joined the battle with 5 playing the role of Harold and his troops and 4 fighting as William and his Normans.
The challenge with Hastings is that the Saxons have zero mobility and a strong defensive position, while the Normans have plenty of fast knights as well as a strong rank of bows/crossbows. Given that combination, motivation needs to be provided for the Saxons to do more than sit there and take on arrows the whole game. The motivation took the form of an objective marker place behind the Norman left flank. The second element is the historical death of Harold and his brothers. This was solved by giving three of the commanders 5 attacks, with the rule that any wound taken would count as a kill.
As luck would have it, the game played out nicely with the Saxons coming off the hill to engage the Britions and capture the objective. The lure of 5 additional dice proved too much and successfully lead to the glorious deaths of Harold and his brothers. With the death of its leaders, the Saxon line was broken and victory was declared for the Normans.


Event Documents:
Adepticon Hastings HC Hastings Objectives
Adepticon: Battle of Arsuf
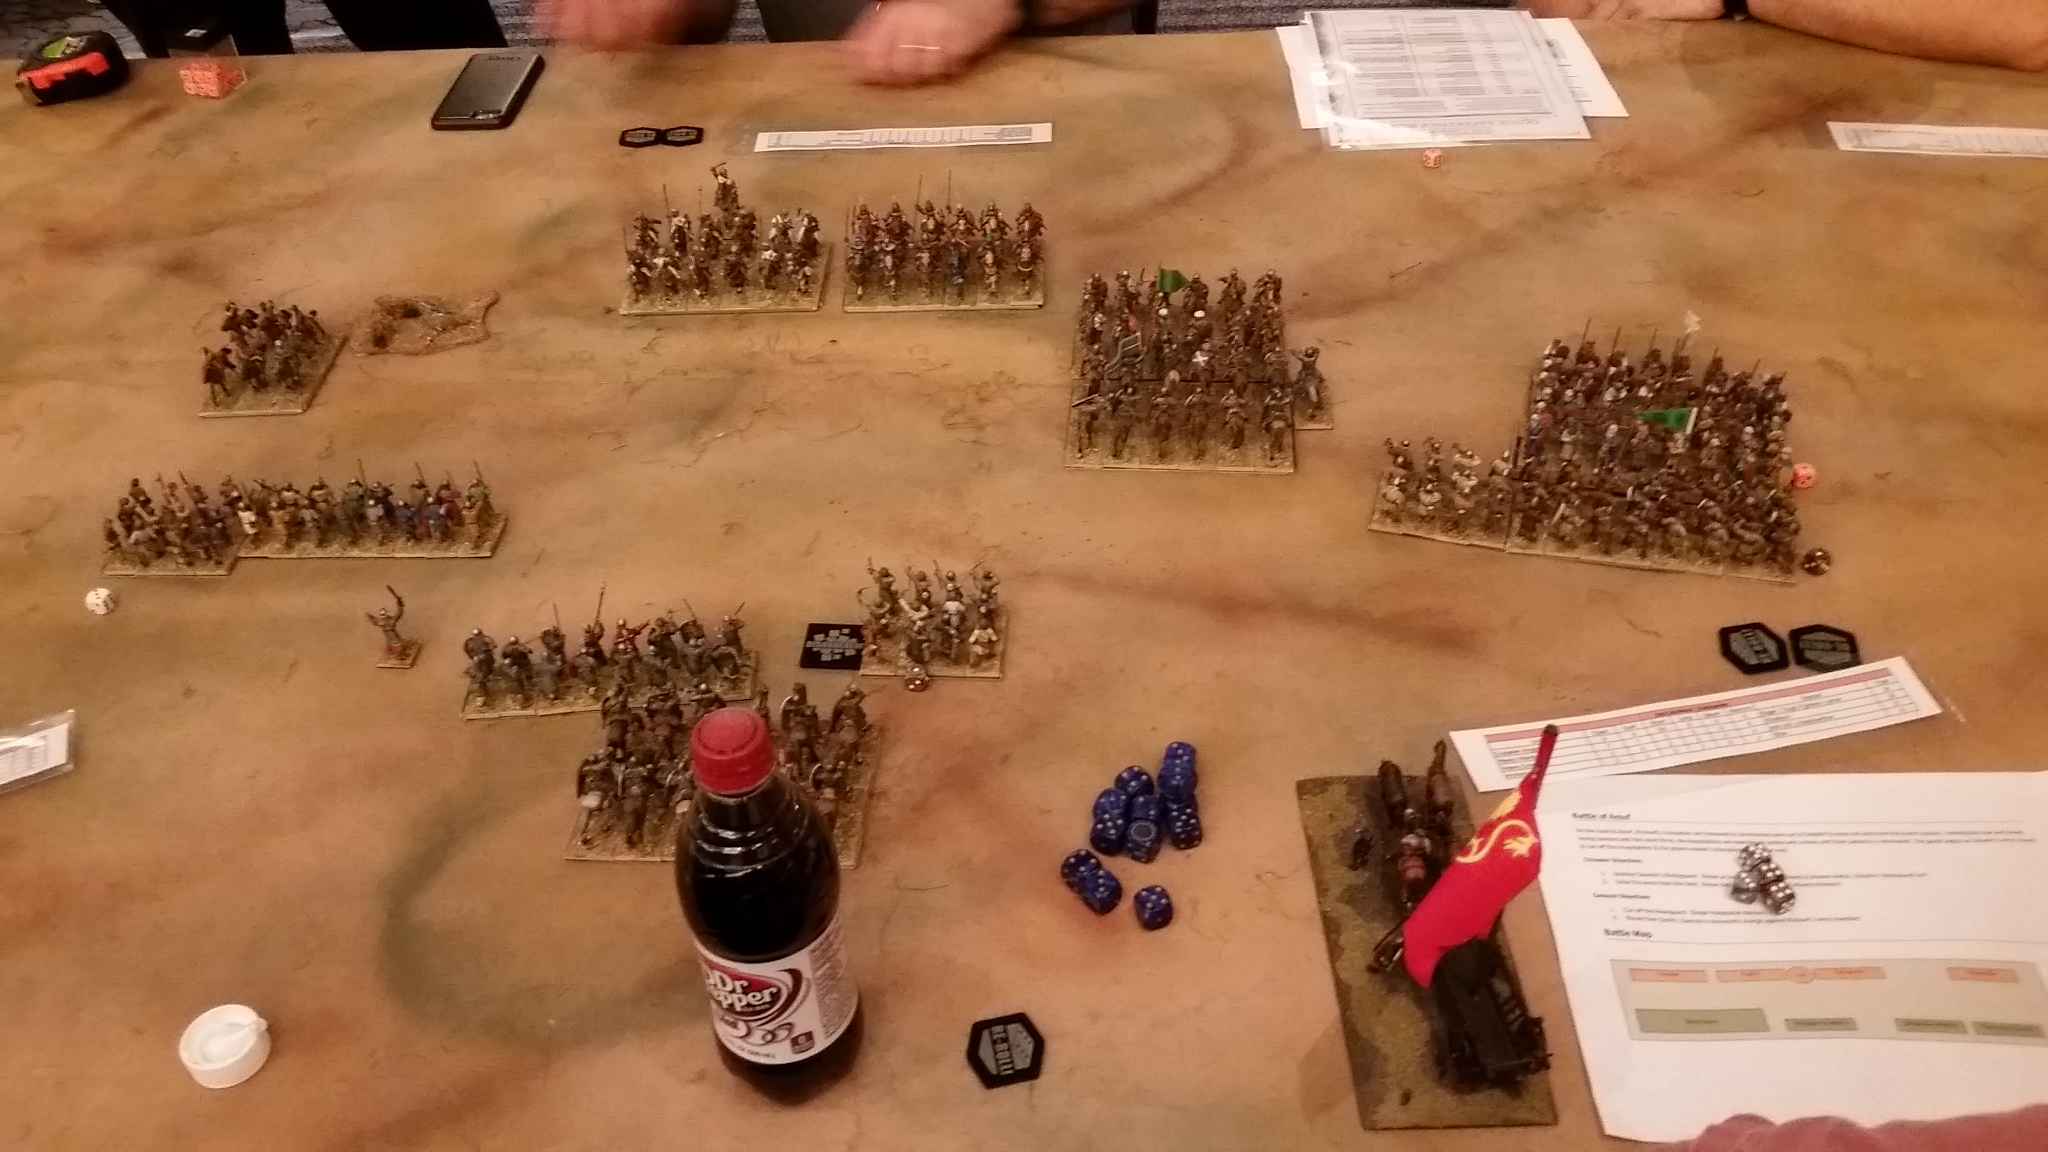
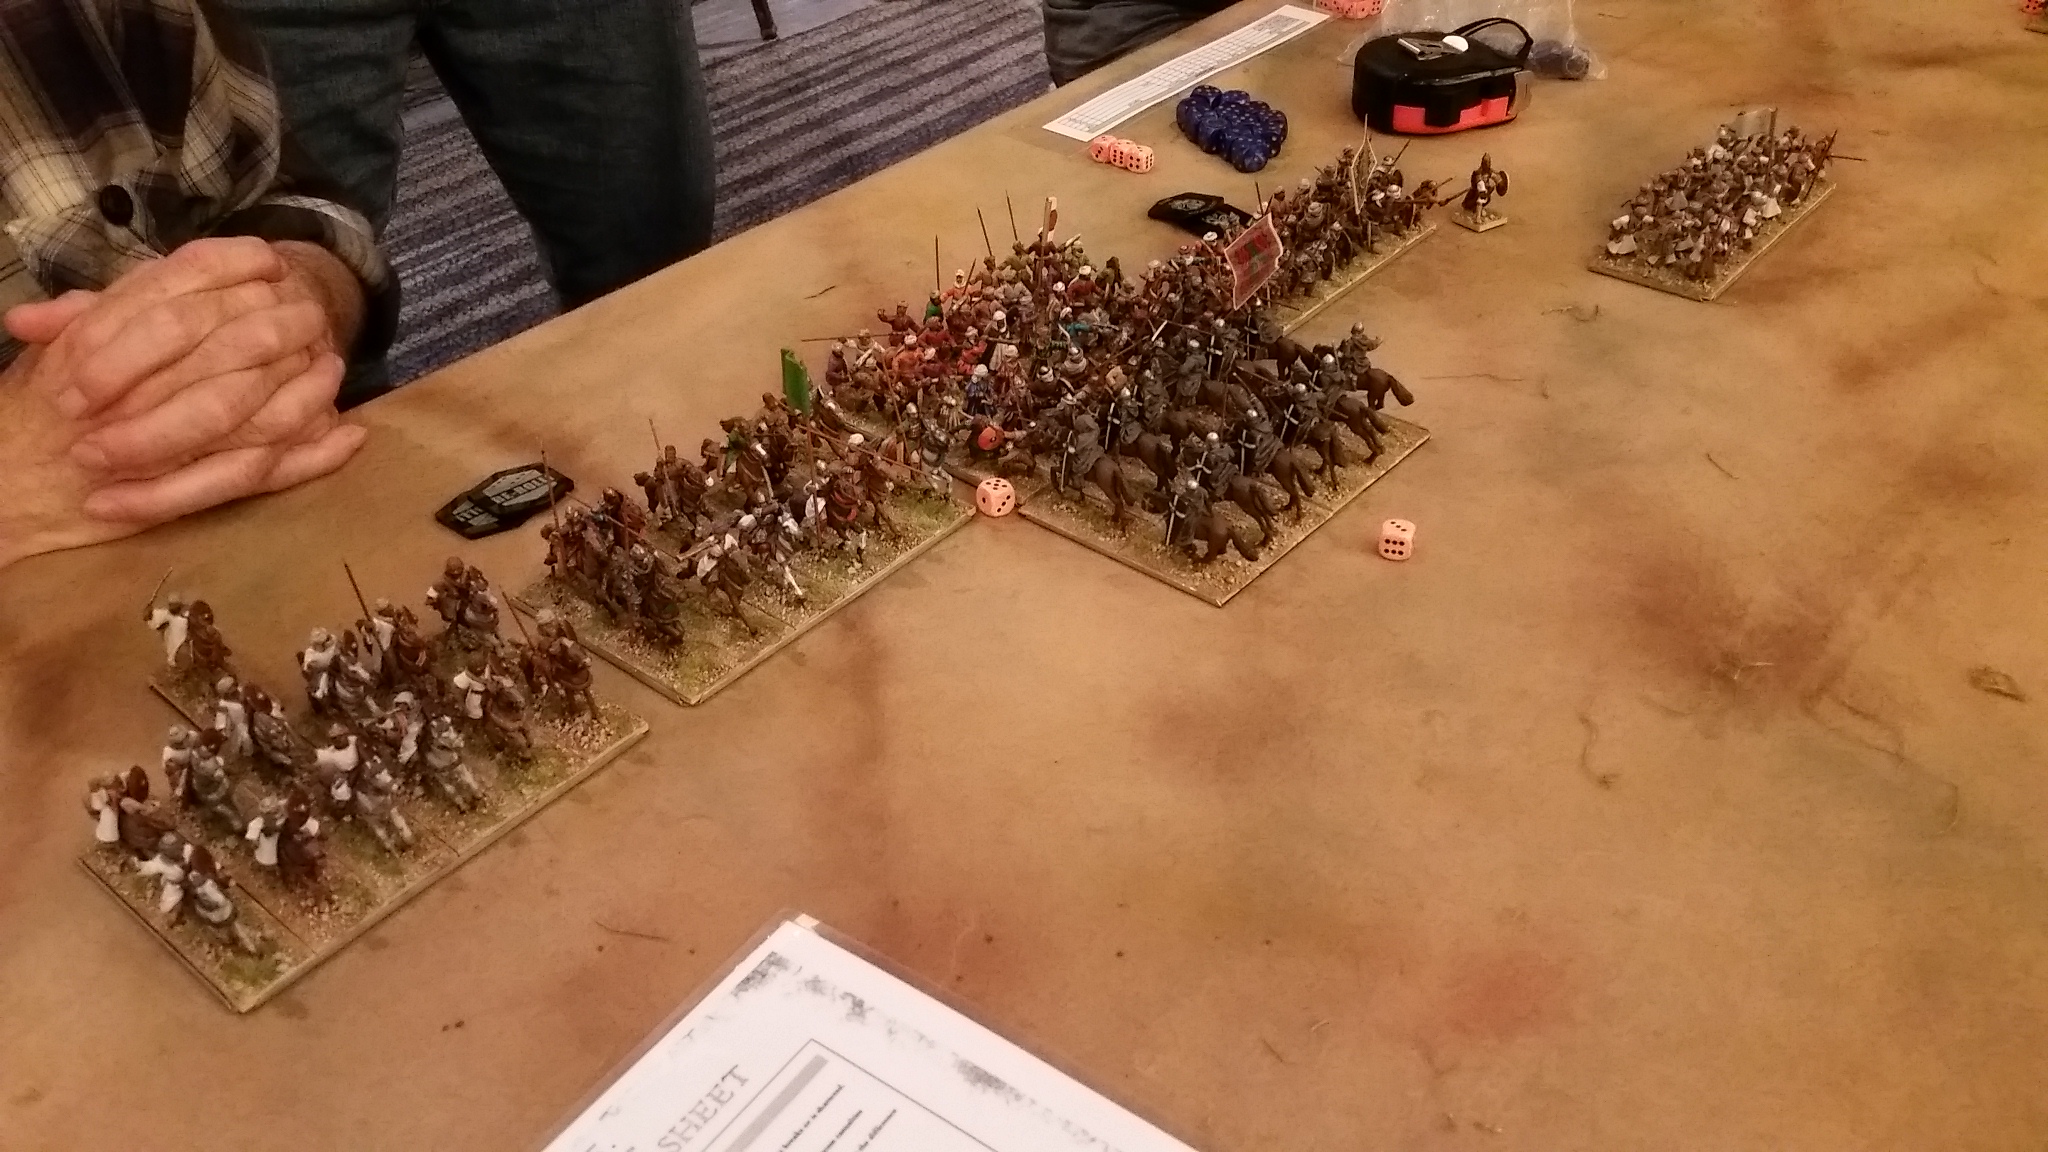
Posted by chicagoterrainfactory in Hail Caesar on April 26, 2016
The iconic Battle of Arsuf almost did not happen this year at Adepticon. I had a bit of an incident moving the armies into the hall.
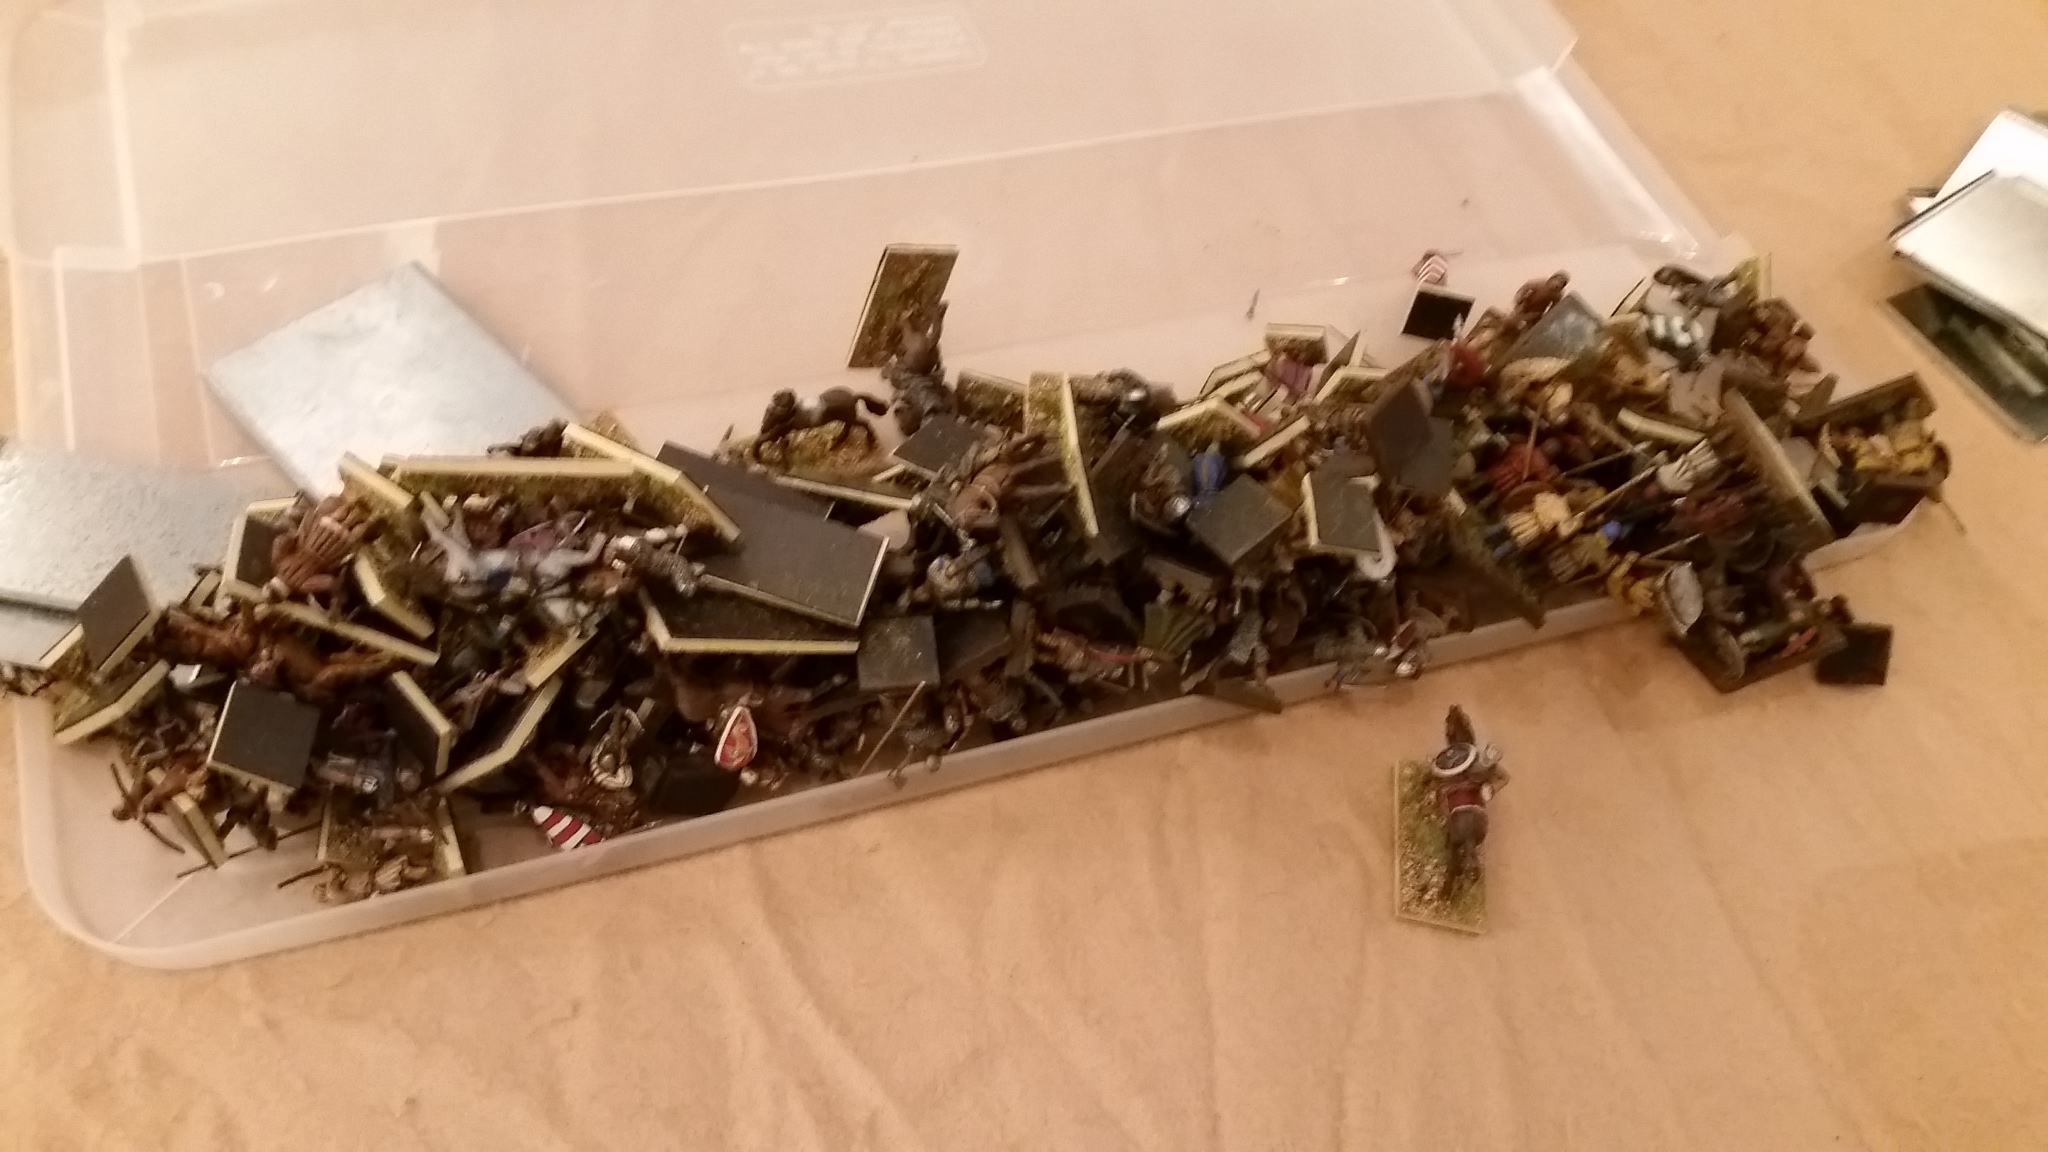
Imagine this times four! Took every minute I had before the game started to just get the figures back on their trays.
Despite the setback, we had a wonderful game with 7 players. Bucking the trend from prior games, the Arab players pulled out a victory this year by taking the action to the Norman players. King Richard was kept busy while the Saracens sent the Hospitallers packing.
Event documents:
-
You are currently browsing the archives for the Hail Caesar category.
XCOM Wargamers

XCOM Wargamers club member

Comments