Archive for category Terrain
Battle of Kursk – Adepticon 2017
Posted by chicagoterrainfactory in Terrain, World War 2 on April 30, 2017
For a second year, my friend Aaron and I hosted a Bolt Action Kursk game at Adepticon. This year’s battle was armor only – not historically accurate, but a necessary change to run a large scale battle planned for 8 players. The table was 12×5 with two large hills, a village on one end, and plenty of wrecks/smoke breaking up line of sight. The teams each had objectives to achieve – both sides needed to inflict casualties on the other and also achieve a movement goal. The Soviets needed to place four tanks into the German deployment zone. The Germans needed to move two tanks onto an objective on one of the hills.
The Soviet players elected to mass their tanks in the central section of the table. While the Germans stayed put behind the smoke. For several turns, the longer range of the German guns picked off tank after tank. It was starting to look like an easy German victory when the Soviets crossed into the German zone and scored their movement objective. Suddenly, the Soviet team was ahead on points. After a brief panic, the Germans rushed to claim their hill & continued to pound the Soviet tanks. Final score was 16 to 10 in favor of the Germans.
Set up for the battle: 20 Soviet tanks face off against 12 German tanks

Burning Soviet tanks fill the fields

Aaron created lite smoke columns using tea lights. Awesome effect.

In the end, nearly all of the Soviet tanks were destroyed.

Panzers in the Smoke Mission brief and tank list
Russian Village
Posted by chicagoterrainfactory in Terrain, World War 2 on March 22, 2017
A new village for the Bolt Action Kursk table, getting ready for their debut at Adepticon Thursday night. Building kits by Sarissa Precision. The kits are small, inexpensive, reasonably detailed and went together without much trouble. Paint was an under coat of black, brown and grey spray paint, then sponge painting to lay down the top coat. Green, yellow and blue were added to spice up the dreary peasant life.


Sometimes, it just does not work out…
Posted by chicagoterrainfactory in Terrain on August 20, 2016
I’ve experimented with a variety of 3D prints for terrain. Generally the results have been sucessful with the various smaller files that I’ve printed at the local library. A few months ago, I backed Real 3D Fantasy Printable Scenery on Kickstarter. For a reasonable price, I received files for four small medieval style buildings. The test files printed without issue, but I the full scale buildings just don’t measure up. The building comes in 5 pieces: roof, 1st floor, 2nd floor and 2 support pillars. The print grain is rough, and the large flat sections warped during printing creating large gaps between the sections (and a funny looking pillar on the left). A second, smaller building failed to print at all. And worst of all, I paid more than $30 for the printing. At that price, I can get a sharp looking MDF building from any number of companies.


Kickstarter Report
Posted by chicagoterrainfactory in Terrain on February 29, 2016
Like a number of gamers, I’ve bought into a number of kickstarters. My most current pledge is a set of 3D files for a medieval village from Real 3D Fantasy Printable Scenery. During the campaign, they provided a number of test files which include an outhouse and a dog house. The prints came out well and should paint up nicely. The Brave Bricklayer will give me enough files to create a small village good for Saga or even WW2. One of the advantages of a 3D file is that the kickstarter will be able to deliver in a reasonable time frame.


Speaking of unreasonable delivery times, 18 months after pledging, I will finally be getting my paints from the Reaper Miniatures Cav kickstarter this month. The Bones kickstarter was a phenomenon, sadly the follow up kickstarters from Reaper all fall short. I have a handful of figures in Bones 3 that will be my last kickstarter with Reaper.
Terrain Trials
Posted by chicagoterrainfactory in Terrain on December 31, 2015
Working on new terrain for the Kursk game at Adepticon. Most Bolt Action games are in built up urban areas with short lines of sight. The Kursk battles included fights on the open steppes of Russia. We played a game using the old trick of foam under cloth and stuffing for smoke. The rolling terrain provided excellent cover for the game. The smoke clouds will be paired with wrecked tanks for the big game.


Farm patch – a brown table mat with lines of flock glued on. Makes for a quick piece of eye candy on the table. The glue warps the cloth and pulls up the corners. Fortunately, the cloth stuck to the felt mat and laid flat for the game.

What makes for a good 40K terrain object?
Posted by chicagoterrainfactory in 40K, Terrain on July 7, 2015
How large should a 40K terrain item be for tournament play? I’m working on a castable shipping container with assorted crates and barrels. The item is 5 inches by 4 inches by 2.25. For those of you still playing 40K, is this large/tall enough to impact the game?


3D files downloaded from Thingiverse and printed at my local library.
Rough Terrain
Posted by chicagoterrainfactory in Terrain on June 30, 2015
Rough Terrain for just about any system and any table. Outcroppings are from a Woodland Scenics rock mold. The large brown brushes are taken from a floor mat. The various greens are static grass and clump foliage.
Is it bad that the bases and castings were pulled out of various boxes from the hobby stockpile from years old projects?

3D Printing
Posted by chicagoterrainfactory in 40K, Terrain on December 29, 2014
3D printing has found it’s way to my local library. I found these three objects online at Thingiverse – the barrels are for a 40K terrain project. The unicorn and cat are for my daughters. The detail on each is pretty good with the most obvious print lines on the horizontal barrels. The unicorn was delivered with a bit of flash – the plastic is stiff (just short of being brittle) but cleans up with knife and clippers. Printing cost is minimal, running 10 cents per gram or about $1.50 per item. Tinkercad is an online 3D object creator, although I may be hard pressed to come up with anything more than a simple set of geometric shapes. Even with basic skill, 3D printing will have its uses for creating game tokens and terrain masters for resin casting.


Quick Links: Pirates and Cowboys
Posted by chicagoterrainfactory in Terrain, web sites on April 28, 2011
A pair of hyper detailed gaming tables presented on the Dressing the Lines blog. First a scratch built old West town then the biggest pirate battle you’ve every seen.

More photos and the back story of the town on Dressing the Lines.
UPDATE: the builder of this western town has started a blog to provide additional details about his terrain building. Colonel O’Truth’s Miniature Issues

A full Napoleonic town under navel assault. History and about a hundred photos at Wargames Society forums.
Adepticon – High Seas, Old West and Warmachine
Posted by chicagoterrainfactory in Terrain on April 10, 2011
One of the great things about Adepticon is how its a venue for all sorts of games that are not 40K.
High Seas had its own tournament this year. My friend John created 5 custom tables each with its own mission. Makes for a bit more work but the results are fabulous.
Old West returned for a 2nd year, this time under new management. I was very impressed by both the event and the terrain created by Irv. Card and printed paper make up the majority of this terrain project. These techniques are so very different from the plaster and paint styles I normally work with – great to see such alternatives put to good use.
Privateer Press came to Adepticon and made a huge impact. Corporate support is not quite Gen Con level, but its getting close. Every swag bag at Adepticon contained a $50 box set for Warmachine. The company shipped in 4 top end terrain tables for the event hall. Staff and volunteers were everywhere. They were even running micro demo tables at the front doors to the 40K hall. GW are you paying attention?
-

- Pirate Castle

-

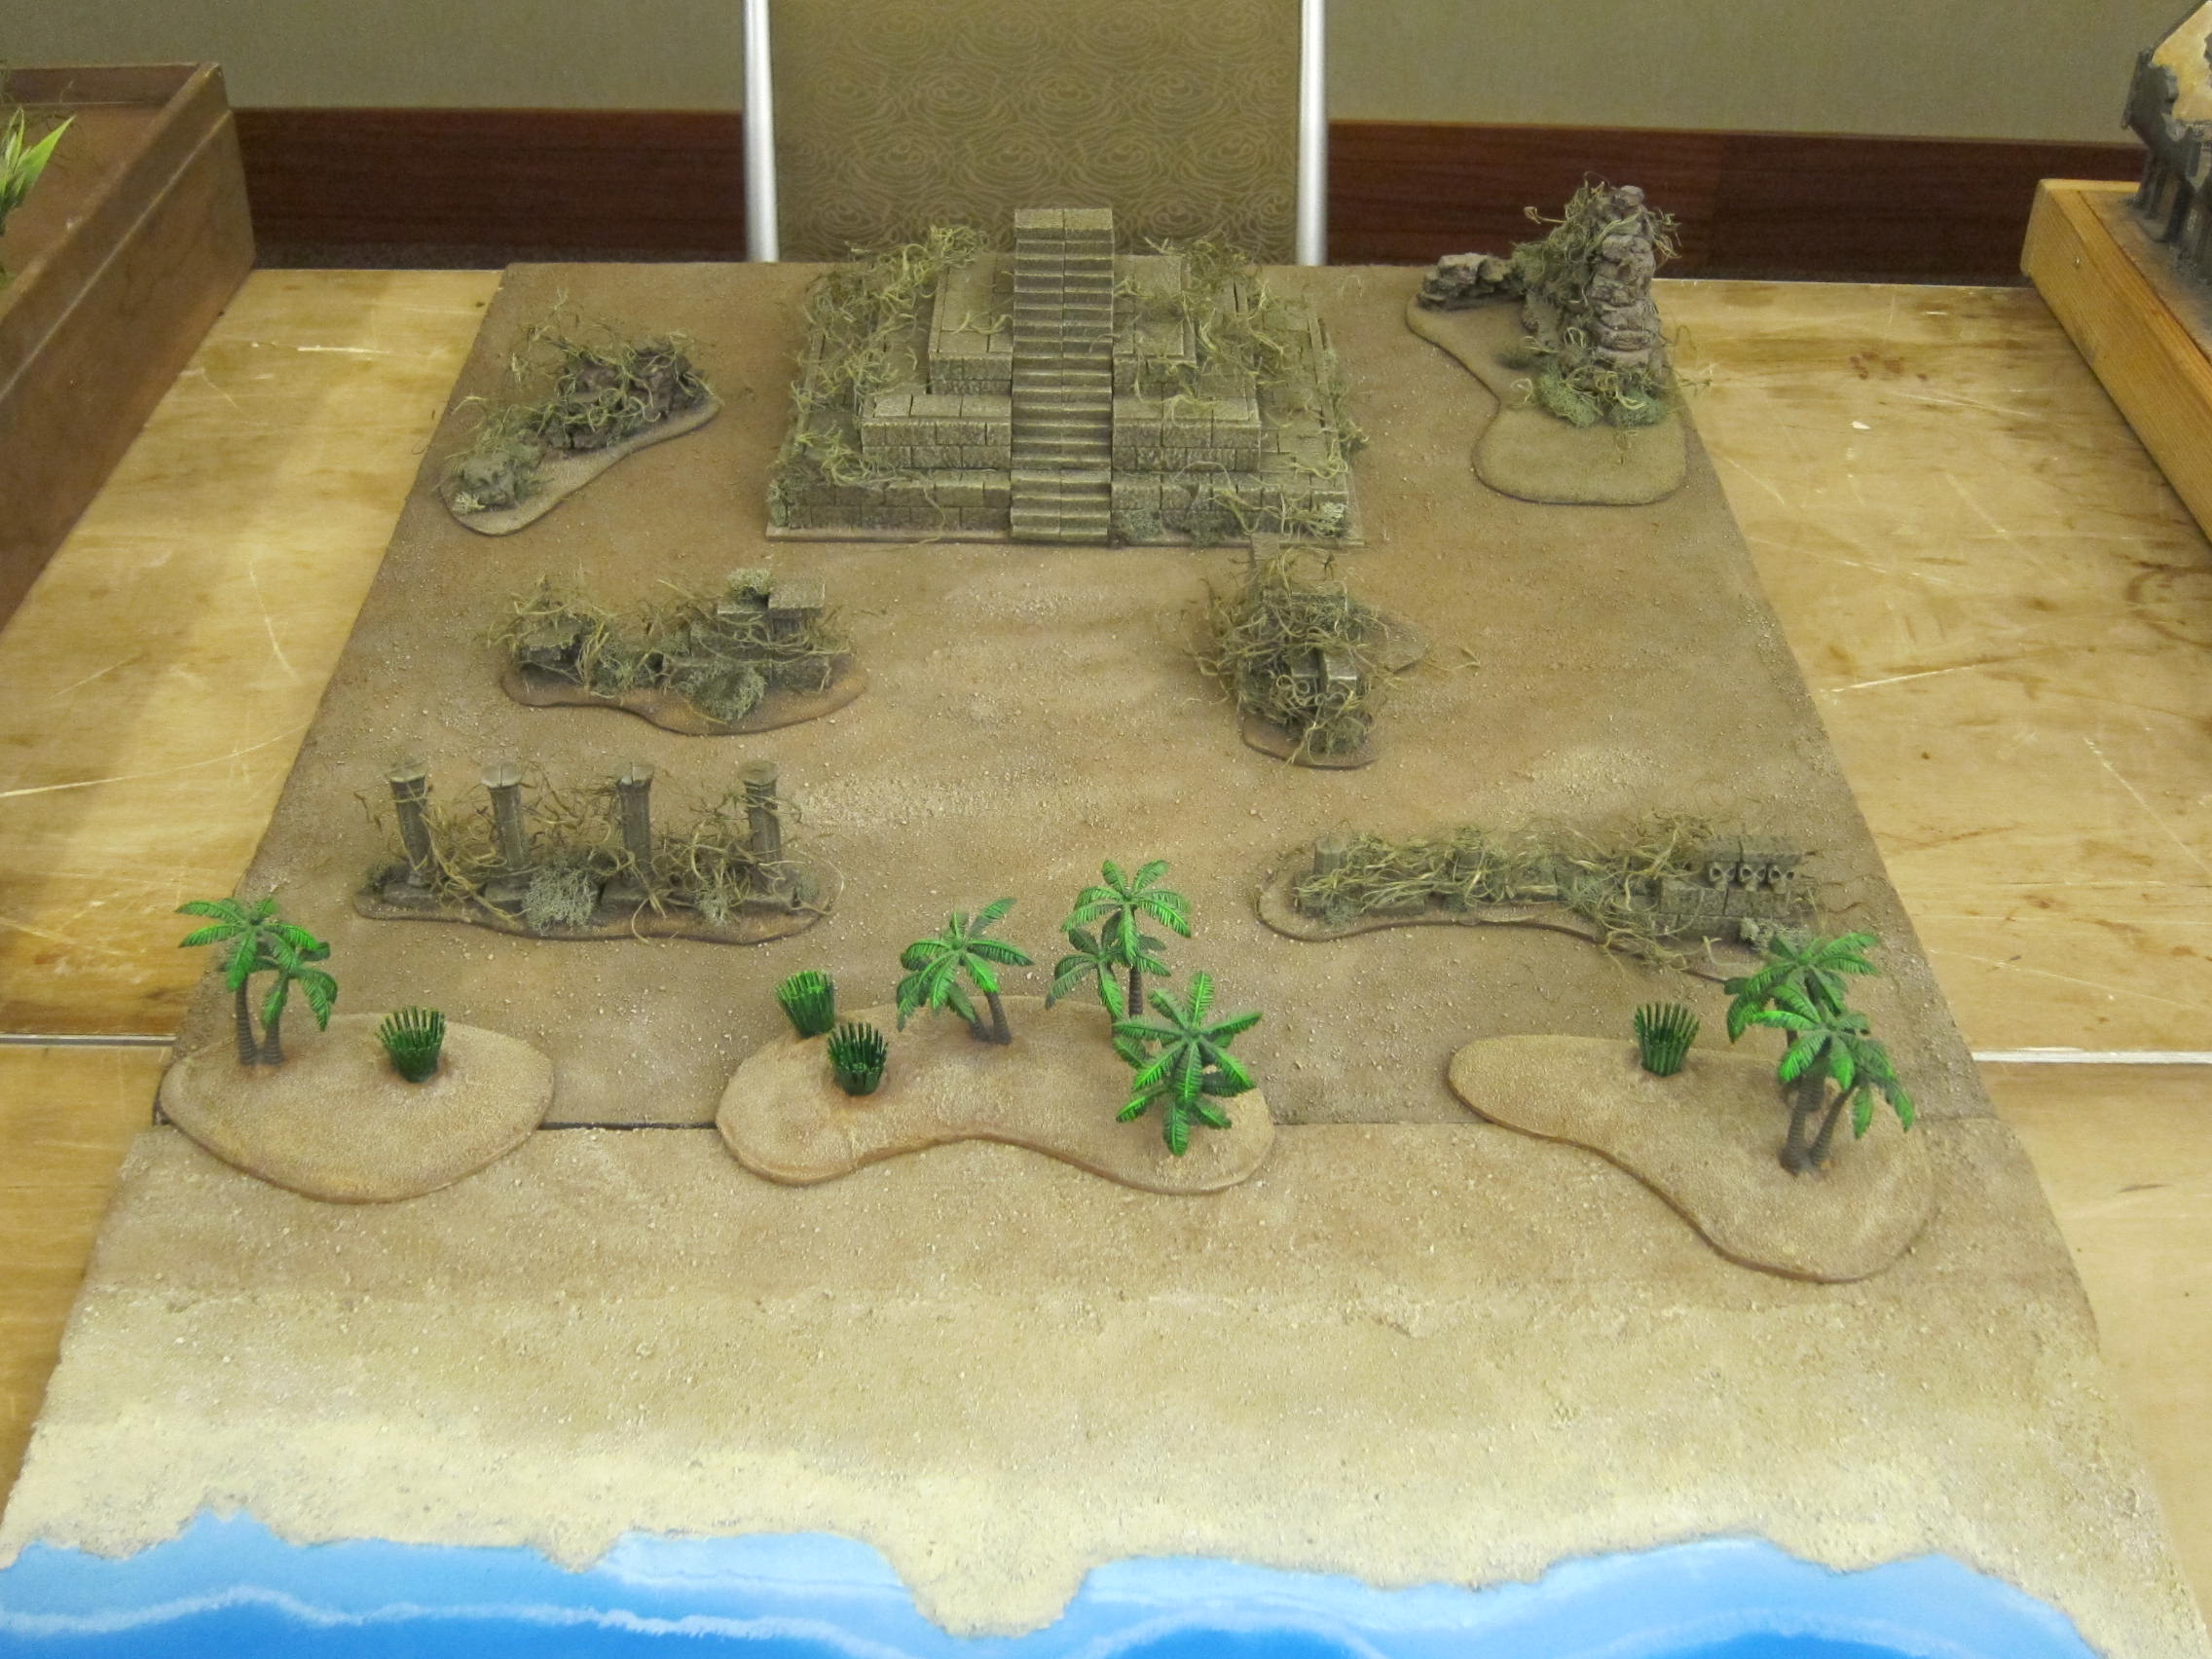
- Pirate Jungle board
-

- High Seas Pirate city

-

- Old West

-

- Old West

-

- Old West

-

- Old West

-

- Warmachine City

-

- Warmachine City

-

- Warmachine City

-

- Warmachine City

-

- Warmachine Train

-

- Warmachine Train

-

- Warmachine Bunker

-

- Warmachine Lab

-

- Warmachine Lab

-

- Warmachine Bunker

-

- Warmachine tables

-

- Warmachine tables
-

- Warmachine tables

-
You are currently browsing the archives for the Terrain category.
XCOM Wargamers

XCOM Wargamers club member

Comments